The “Companies” menu is exclusive to CosTracker3 (CT3) users; however, it is similar to the "Company Information" menu in JobTracker3. Almost all entries in CT3 (purchase orders, daily entries, work orders, etc.) are tied to a company and most reports are broken down at the company level to distinguish and separate charges for each company. This article explores the different tabs and functionalities in the “Companies” menu.
This is also one of several menus that can be pre-filtered, to limit what data is loaded when exploring companies. For example, if you only want to load active companies assigned to a given processor you'd do the following:
Click the filter icon at General > Companies.
Click the "Add" dropdown and select the "Company - Processor Username" filter, and then load the satisfying records. The "Only active records" checkbox is flagged by default to only load active records. Uncheck it if you'd like to load inactive records as well.
Let's explore the other functionalities, below.
Adding Companies
To add a company click General > Companies.
Click append (+) to add a new row, then enter the details for each record. You can also use the buttons to the right of the append button to modify or delete the selected record(s).
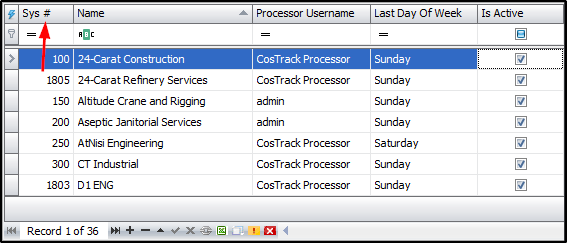
Once a new row is added, you can fill the underlying details for each record in the grid or in the tabs below the grid. A Sys # (distinct, system-generated number) will be assigned to each new company.
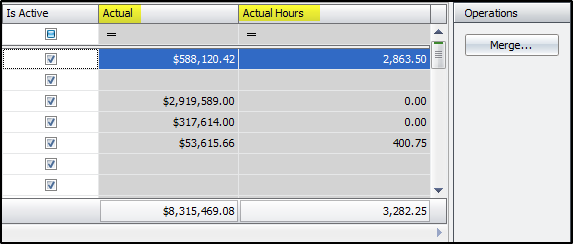
The columns that are grayed out are read-only and cannot be modified in the grid, as the data feeds from different menus in the software. In this example, the data in the "Actual" and "Actual Hours" columns are generated from cost-to-date data on purchase orders.
After adding and editing records, click on “Save” to accept changes as the data is not automatically saved after records are added, modified or deleted.
Data Grid
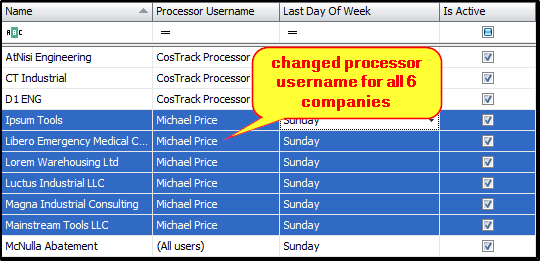
One of the advantages to making changes in the grid is that you can apply the same change to multiple records simultaneously. After selecting the desired records, make the change in one of the selected cells then press tab and that change will take effect for all selected rows in that column.
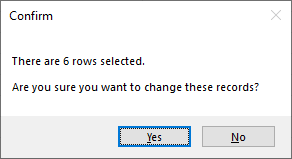
You will be prompted to confirm changes that affect more than five (5) rows at a time.
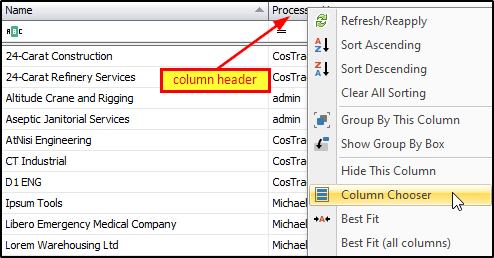
Some columns in the grid may not be visible, but can be retrieved from the column chooser, which basically houses the hidden columns. To retrieve a hidden column, right-click a column header and select "Column Chooser" from the context menu.
This will open the "Customization" form with the list of available columns for that screen.
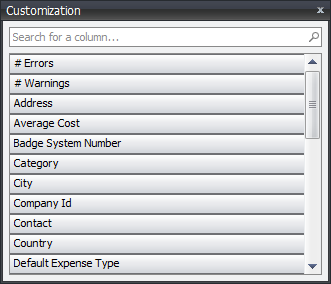
From there, drag and place the desired column(s) from the form, to the grid. The two arrows facing each other indicate where the column header will be placed in the grid. In this example, the category column is being placed between the processor username and the last day of week columns.

See the data grids article for more in-depth details on data grids.
The tabs below the grid have a wide array of cells to add supplementary details to each record, but only allow modifying one record at a time. In some instances, if multiple records are selected in the grid then the data in the tabs will be grayed out, thus, unmodifiable. For each cell, you can either type the details in the textbox, or select an item from the dropdown list. These dropdown items must be added or imported into the software before they're available for selection. Let's explore each tab a little closer.
Overview Tab
The “Overview” tab has four sections: "Contact", "Company Email", "Assignment", and "Behavior".
The "Contact" section contains contact details for the company, as well as the name of the company representative who serves as liaison or point of contact.
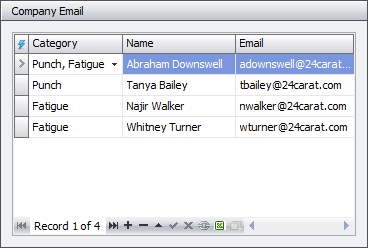
The "Company Email" section contains details from the company email addresses menu, that can be used to send automated reports (i.e. punch reports, fatigue reports, etc.) to the recipients in the list. Each recipient can be added to one or more categories, thus included on multiple reports. In this example, Abraham Downswell is set to receive punch reports as well as fatigue reports.
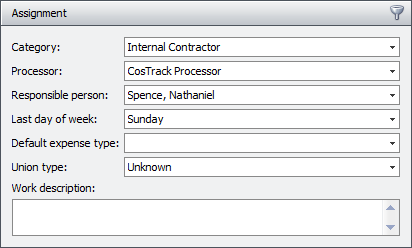
The "Assignment" section handles company assignments. The category field tells which bracket of companies the selected company is grouped with. The processor is the individual assigned to undertake process and audit duties (timesheets, etc.) for the company. When a processor is assigned, the company's daily entries records will show up on the processor's dashboard. The responsible person is the individual (usually a department manager or supervisor) who approves charges for work done by the company. The last day of week determines when the contractor's work week ends, and affects how ST/OT/DT hours are allocated and calculated, among other things. The default expense type is the standard type of expense that the company charges. The Union type dropdown lets you select the labor union that the company is affiliated with, if any. Lastly, the work description field is a notes field that can be used to describe the primary tasks or type of work that the company undertakes.
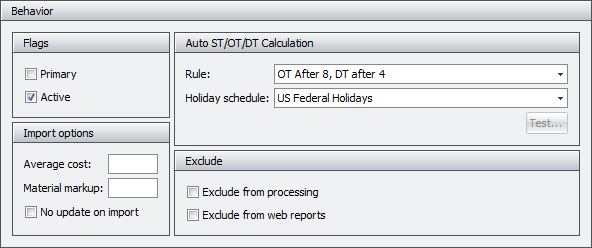
The "Behavior" section describes how some activities are treated and organized. In the "Flags" box, you can set whether the company is part of a defined list of primary companies (for reporting purposes), and whether the company is active or inactive. Companies flagged as inactive are grayed out in the grid.
In the "Import options" box you can set the average cost from Primavera imports. This will give you a general idea of what the total or anticipated cost will be at the end of a project. Additionally you can set material markup on material, other, and lump sum timesheet imports to fill in the markup amount when the column is not mapped in the import preset, or when the column is mapped and markup is not set. The no update on import checkbox prevents updating the company information (such as name, accounting code, etc.) on future company imports.
In the "Auto ST/OT/DT Calculation" box you can select a calculation rule and/or holiday schedule that use defined logics to automatically calculate ST/OT/DT hours, etc., on timesheet imports.
The "Exclude" box provides options to omit the company from processing or web reports websites. If you tick exclude from processing, the company will not show up on the dashboard or on the processing website. If you tick exclude from web reports, the company will not show up on evacuation, fatigue, and force reports. It will also be excluded from headcount and onsite reports on the reporting website. Be vigilant when choosing what the company is to be excluded from.
System Numbers Tab
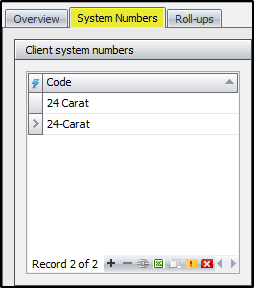
The “System Numbers” tab has four sections: "Client system numbers", "Primavera numbers", "Gate system numbers", and "Track numbers". This tab defines how CT3 interacts with different company codes generated or exported from external project and portfolio management software.
"Client system numbers" are assigned from the accounting system, and are used mostly for PO imports. These stored codes can be used instead of a company name or number for most of the user-driven imports.
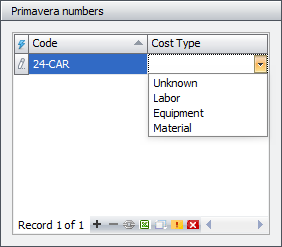
"Primavera numbers" deal with Primavera-related company coding. If needed, you can assign a cost type to each code as well. Otherwise, leave the cost type field blank.
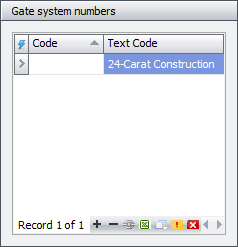
The "Gate system numbers" are intended for systems that store punch records and gate data, such as Lenel. These codes can be stored as numeric values (code) or alpha-numeric values (text code), and are used to assign employees' punch records to their designated companies.
The "Track numbers" section handles codes from Track and strictly uses numeric codes.
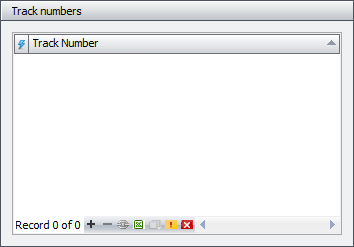
Each section in the system numbers tab helps to smoothly integrate data imports and data transfer from different systems to CT3.
Roll-ups Tab
The "Roll-ups" tab handles the parent-child relationship between companies when one company rolls up to the other. The relationship can be exclusive, where all activities for one company gets rolled up to the other. It can also be project specific, where activities for a project gets rolled up to one company while activities for another project gets rolled up to another. This is generally useful in subcontracting scenarios. 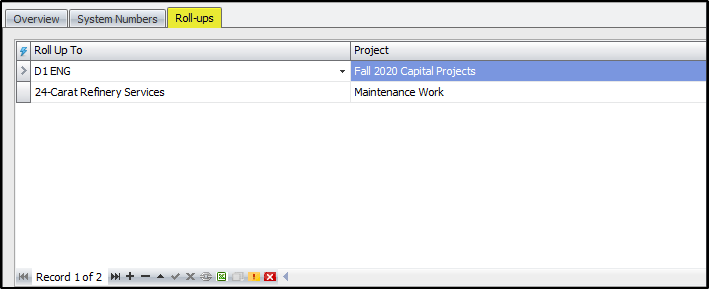
When running reports with company roll-ups, be sure to select the "Roll up companies" checkbox in the prepared database so the charges for all companies will be accurately reflected.
Merging Companies
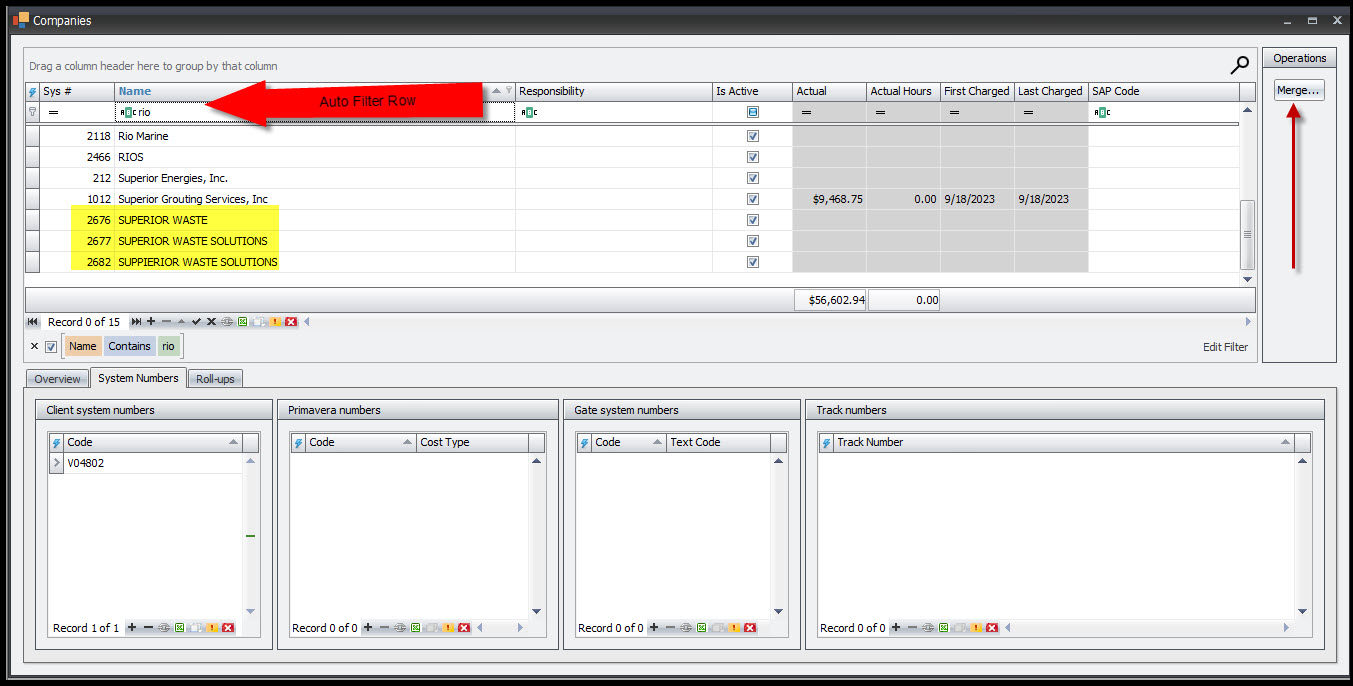
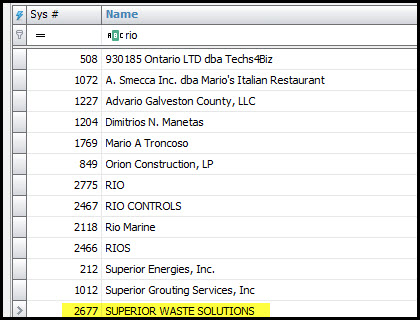
Companies can be amalgamated to combine multiple companies (and their affiliated records) into one company. To merge 2 (or more) companies, select the one you wish to merge from (get rid of), and then click on "Merge" in the "Operations" section (to the right of the grid). By using the auto filter row, I am able to locate the companies together in the list. In this example "SUPERIOR WASTE" (2676) and "SUPPIERIOR WASTE SOLUTIONS" (2682) will be merged into "SUPERIOR WASTE SOLUTIONS" (2677). Clicking merge will open the “Merge Into” form for you to filter for and select the company you wish to merge into, then click OK to move to the next step.
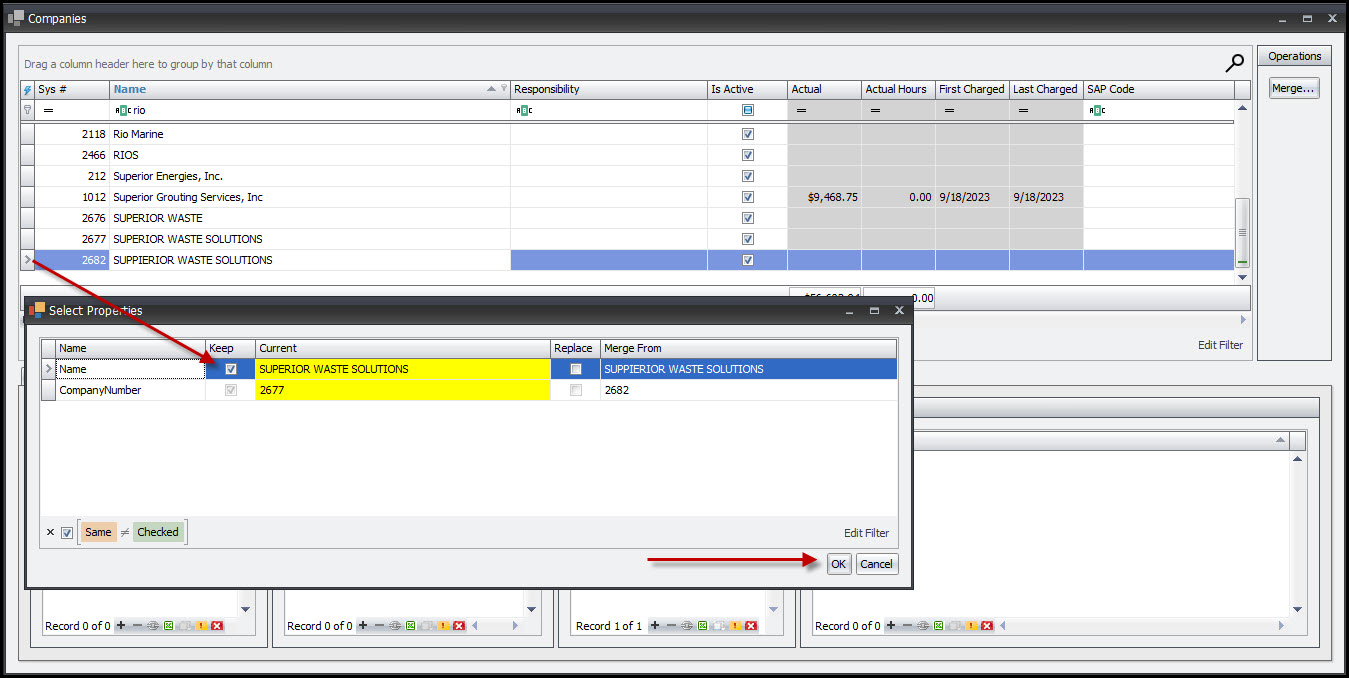
In the "Select Properties" form, tick the checkboxes for the properties you wish to keep, then click OK. You can select a checkbox from either the "Keep" or "Replace" column for each row; not both. The properties that will be kept after the merge is executed are highlighted in yellow. Confirm that you wish to merge.
Afterwards, the software will combine the records for both companies and complete the merge.
PLEASE NOTE: If one company rolls up to the other, then you cannot merge both companies. When this happens, go to the “Roll-ups” tab and remove the company that is being rolled up to, then try merging again.
Importing Companies
Companies can also be imported into CT3. This is the preferred method when adding companies in bulk or just adding several companies simultaneously.
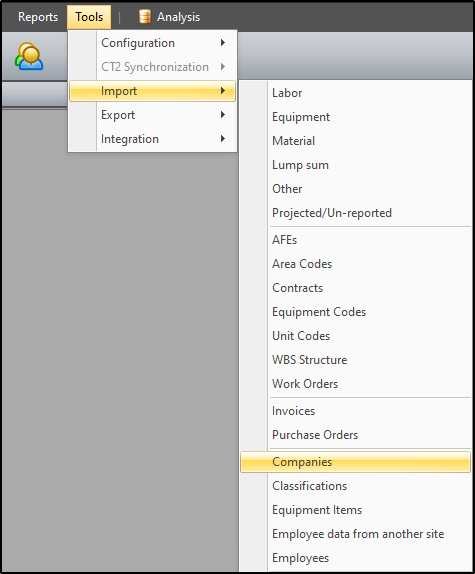
To import companies, click on Tools > Import > Companies.
You can add a new preset if none is established for that company or edit an already established preset. You can also remove, duplicate, import or export presets if necessary.
![]()
The “Data Source” box lets you locate the directory path for your import file by clicking on the ellipsis. You can also choose which sheet number to import from and set the number of rows to skip to accommodate headers, etc. Upon saving the import preset, it displays the assigned file type in the title and lets you update the preset location to a file or folder for future imports.

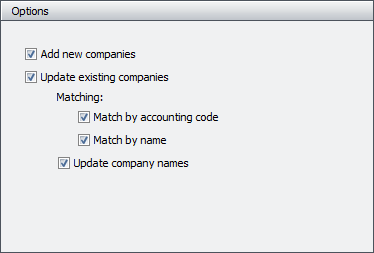
The “Options” box governs how current and future imports affect each other and determines if new companies should be added, and how existing companies should be updated.
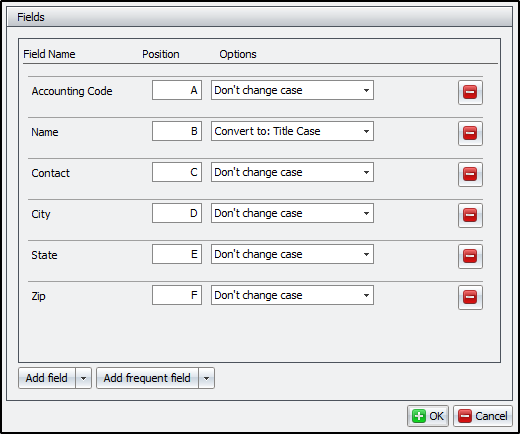
The “Fields” box handles the underlying details of the import. Here you add the desired fields to import and assign the position to correlate with the columns in your spreadsheet. Click the “Add field” dropdown to add a field and the remove button (red button to the right) to get rid of a field. You can also change font cases for select fields.
Once the preset is prepared, click “OK” to save. From there click “Import” to import the data then review and confirm the import.