Punch records are used to track and calculate employees’ work hours and tell when employees are on-site or off-site. These records can be retrieved in several ways, but are usually imported into the software. Punch records are typically identified as an 'in' punches, 'out' punches or 'unknown' punches (anything that is not necessarily in or out), and tell what gates employees use when badging in and out of the job site.
Accessing Punch Records
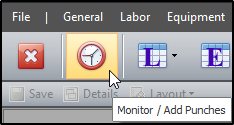
To access punch records, click the ‘clock’ icon on the toolbar.
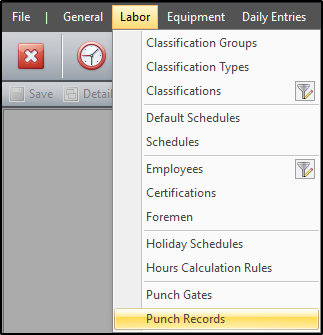
Alternately, you can click Labor > Punch Records.
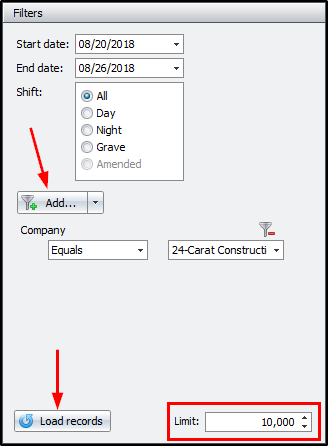
This interface has two (2) sections: “Filters” and “Records.”
The “Filters” section determines the punch records that will be displayed in the "Records" section. This is where you'd set the start date, end date, and shift for these records. Furthermore, you can use the "Add" button to set additional filters that limit what punch records are loaded. After the filters are applied, click on “Load records” to load the matching punch records. You can also limit the maximum number of records to load by typing the number in the “Limit:” box or using the up/down arrow to increase/decrease increments.
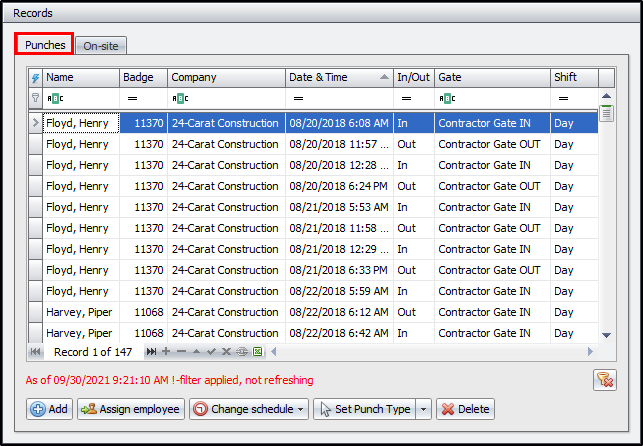
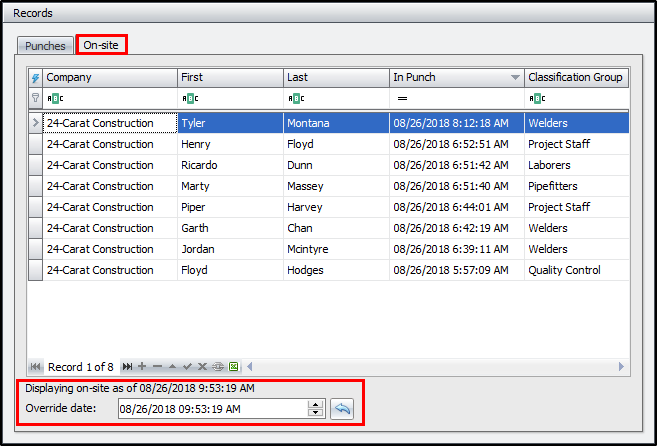
The “Records” section has two (2) tabs that display details for the loaded punch records and tells which employees are on site at a given time. The "Punches" tab displays the particulars for each punch activity, which includes the employee, company, date, shift, etc.
Alternately, the "On-site" tab shows all the employees that are on site, at a given time, for the filter(s) specified above. Expand or remove the filters if you'd like to view more or all employees on site in an instance. On top of that, you can also use the “Override date:” box to change the date/time and query historic records.
Punch Record Commands
On the “Punches” tab, in addition to displaying the punch records, the buttons at the bottom let you perform additional tasks. Let's explore each item further.

To add a new punch record click on “Add,” and fill in the details of the new punch record in the pop-up form. An employee must be assigned to the punch record for it to be saved. After filling in the details, click on “Add” to save the punch record.
To assign an employee to the selected punch record(s), click “Assign employee,” select the desired employee in the pop-up window and click “OK.”
Afterwards, click “Yes” to confirm the change.
To change the schedule for the selected punch record(s), click “Change schedule” and select the desired schedule from the dropdown. This is the best way to change punches and employees' schedules simultaneously.
If more than 10 active schedules are available, a pop-up form with a drop-down of the active schedules will be displayed instead. Click "Select" after choosing the new/updated schedule.
Click “Yes” to confirm the change.
You will also get a follow-up prompt asking if you’d like to assign the new schedule to the selected employee(s). Please be vigilant with your selection here.
To set a different punch type to the selected punch record(s), click “Set Punch Type” and select the desired punch type from the dropdown.
Click “Yes” to confirm the change.
To delete the selected punch record(s), click “Delete” and confirm deletion.
You can also use the "Stop filtering results" button (to the right) to discontinue filtering results. Note however, that this does not remove any filter that the user sets in the filters section, it just displays all (or the maximum number of) punch records instead.
Importing Punch Records
Importing punch records into CT3 is an efficient way to add data in bulk or transfer data from one job site to another.
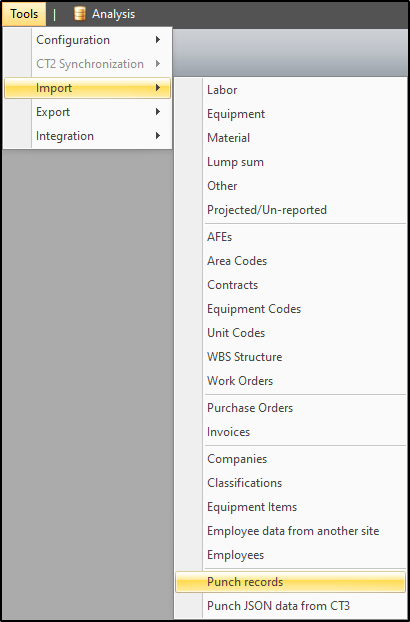
To import punch records, click on Tools > Import > Punch records.
You can add a new preset if none is established for that company or edit an already established preset. You can also remove, duplicate, import or export presets if necessary.
The “Data Source” section lets you locate the directory path for your import file by clicking on the ellipsis. You can also choose which sheet number to import from and set the number of rows to skip to accommodate headers, etc. Upon saving the import preset, it displays the assigned file type in the title and allows update preset location to a file or folder for future imports.

The “Fields” section handles the underlying details of the import. Here you add the desired fields to import and assign the position to correlate with the column in your spreadsheet. Click the “Add field” dropdown to add a field and the remove button (red button to the right) to get rid of a field.
Once the preset is prepared, click “OK” to save. From there click “Import” to import the data then review and confirm the import.
Importing Punch JSON data from CT3
An alternate way to import punch records into CT3 is importing Punch JSON data from CT3. A punch data export must first be executed from the “Punch Reports” menu (generally from in a different site or database), before you can import those records into the current CT3 database.
To export punch data to a JSON file, click on the “Export punch data” dropdown on the “Punch Reports” menu.
Select “JSON For JobTracker/CosTracker Import” from the list and save the exported data.
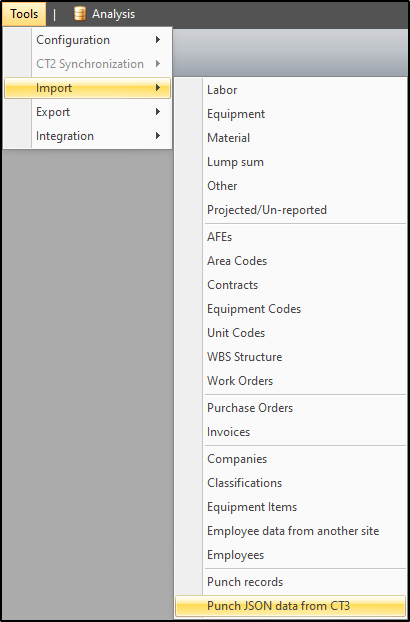
To import punch JSON data from CT3, click on Tools > Import > Punch JSON data from CT3.
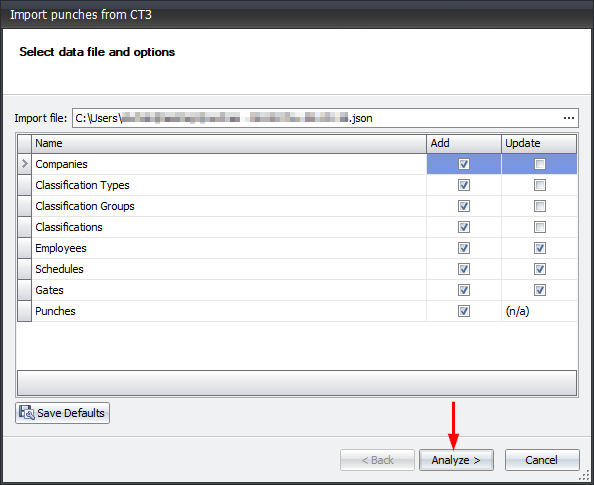
Here you will click on the ellipsis to locate the import file, flag the checkboxes for the items you’d like to add and update, then click on “Analyze” to analyze the data.
The analysis will provide a brief synopsis of what data will be imported. Afterwards, click on “Import Punch Data” to import the data into CT3.
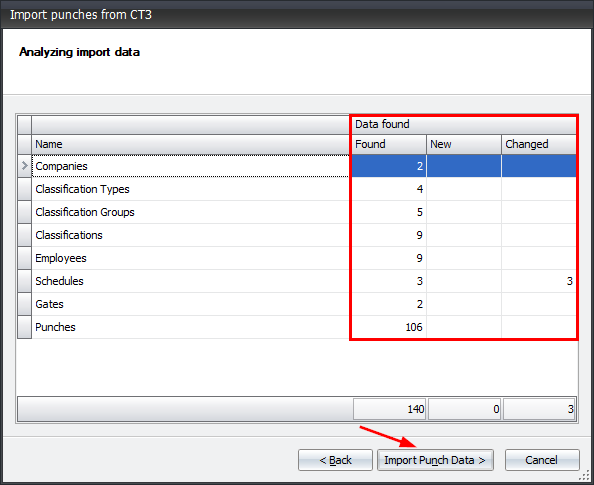
Once the data is successfully imported click on “Finish” to close the wizard and complete the process.
The new records can now be accessed in the “Punch Records” and “Punch Reports” menus, respectively.