The punch gates on a jobsite serve as points of entry and exit to and from the premises and different areas within the premises. In this article we will explore setting up gates, assigning gate types, and look at how the different gate types affect the calculation of punch records on punch reports.
Adding Punch Gates
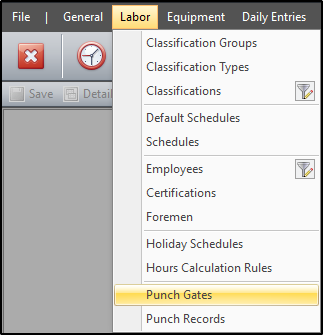
To add or set up a punch gate, click on Labor > Punches Gates.
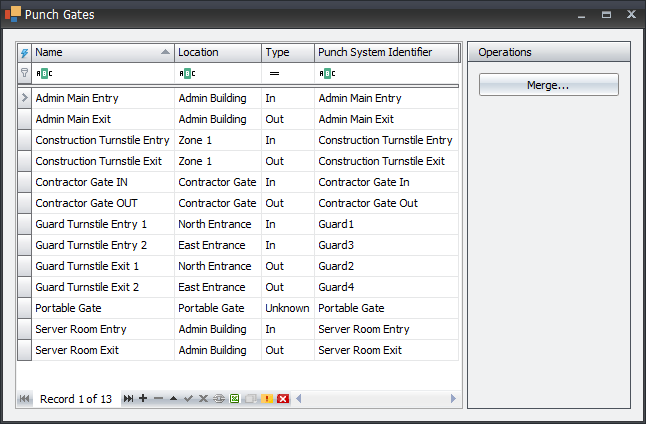
Click the append button (+) on the navigation bar to add a new record. You can also use the buttons to the right of the append button (+) to modify or delete the selected record(s).
For each new row you can add the gates, specify where they’re located, set whether they’re entry or exit gates and also assign punch system identifiers to each gate. Punch system identifiers are generally imported and are the external system identifiers used in program where the gate logs were imported from (i.e. Lenel). As highlighted below, the nomenclature of the punch system identifier is not always the same as the names assigned to the gate in the software.
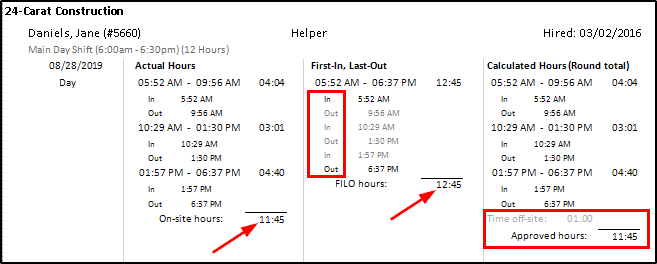
It is important to note that “Unknown” gate types do NOT accurately contribute to the calculated hours on a punch report, so be vigilant when assigning gates as such. For example, this punch report only has ‘in’ and ‘out’ gates and correctly calculates time on site, time off site and approved hours for the employee.
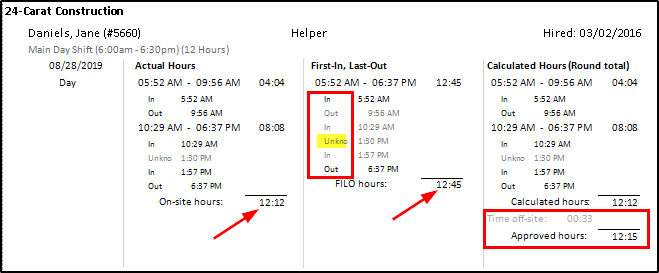
On the other hand, this punch report has ‘in’ and ‘out’ gates, as well as an ‘unknown’ gate. In this case, the employee’s off-site time is not accurately calculated, thus reflecting the wrong approved and on-site hours.
After all the gates are added and correctly labeled, you can proceed to import punch records to further produce punch reports.
Merging Punch Gates
Gates can be amalgamated to combine multiple gates (and their affiliated records) into one gate. To merge 2 gates, select the one you wish to merge from (get rid of), then click on “Merge” in the “Operations” section.
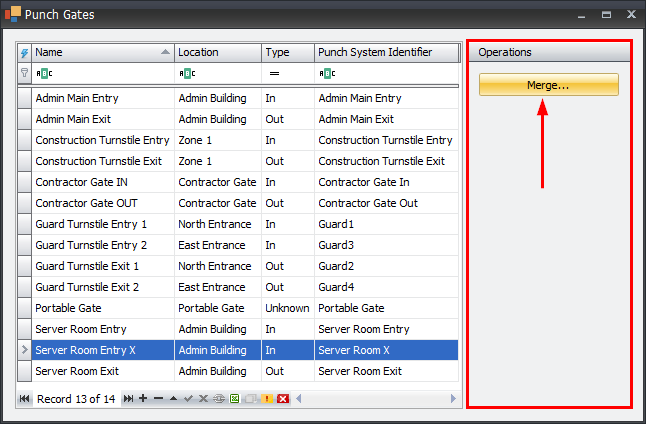
In the next window, select the punch gate to merge into and click “OK” to move to the next step.
Select the properties you wish to keep, then click “OK”.
Confirm that you wish to merge.
You will then receive a notification that the merge is successful.
NOTE: While there is not a particular option in the import menu (Tools > Import) to import punch gates, they can be imported when importing punch records, as long as the field is mapped in the import preset.
This concludes the different set of activities for punch gates