The work order menu serves as a platform to create and manage work orders. A work order is a utility that describes and manages approved work and tasks to be completed, and sometimes outlines a process for completing said tasks. This article explores the range of activities that can be performed in this window.
This is also one of several menus that can be pre-filtered, to limit what data is loaded when exploring work orders. For example, if you only want to load active work orders for a given expense type you'd do the following:
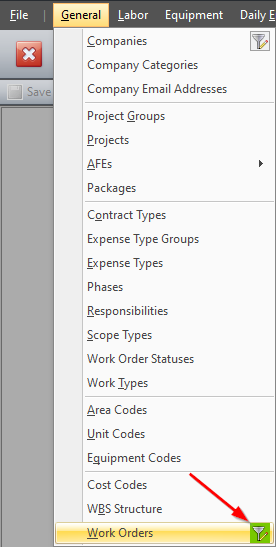
Click the filter icon at General > Work Orders.
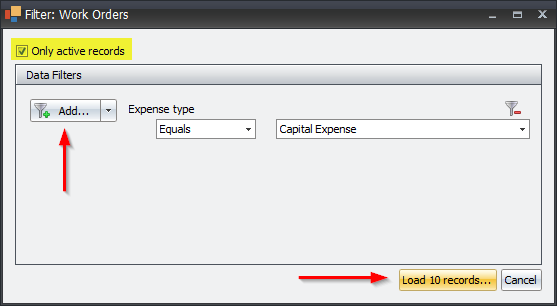
Click the "Add" dropdown and select the "Expense type" filter, then load the satisfying records. The "Only active records" checkbox is checked by default to only load active records. Uncheck it if you'd like to load inactive records as well.
Let's explore the other functionalities, below.
Adding Work Orders
To add a work order, click on General > Work Orders.
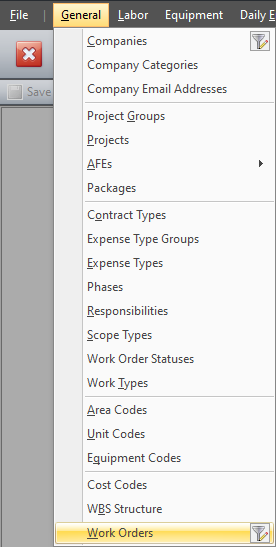
Click append (+) to add a new row, then enter the details for each record. You can also use the buttons to the right of the append button to modify or delete the selected record(s).
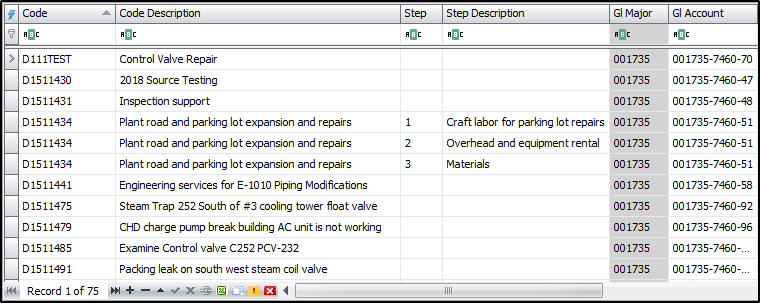
Once a new row is added, you can fill the underlying details for each record in the grid or in the tabs below the grid. The columns that are grayed out are read-only and cannot be modified in the grid, as the data feeds from different menus in the software. In this example, the "GL Major" column is based on data from the "GL Account" column.
After adding the records, click on “Save” to accept changes as the data is not automatically saved after records are modified or deleted.
Data Grid
One advantage to making changes in the grid is that you can apply the same change to multiple records simultaneously. After selecting the desired records, make the change in one of the selected cells then press tab and that change will take effect for all selected rows in that column.
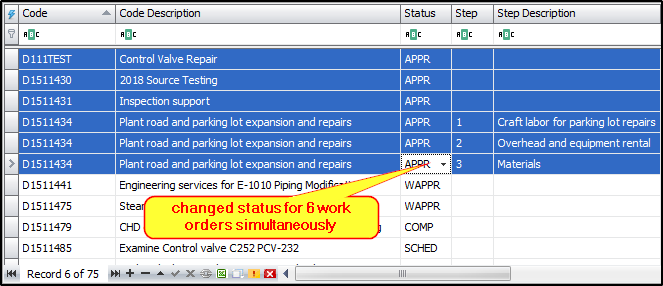
You will be prompted to confirm changes that affect more than five (5) records at a time.
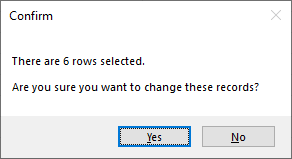
Some columns in the grid may not be visible, but can be retrieved from the column chooser, which basically houses the hidden columns. To retrieve a hidden column, right-click a column header and select "Column Chooser" from the context menu.
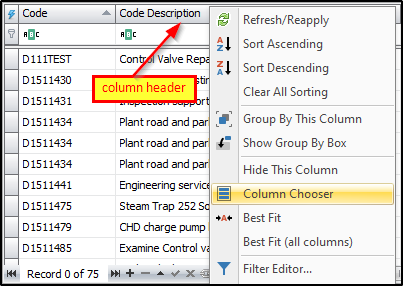
This will open the "Customization" form with the list of available columns for that screen.
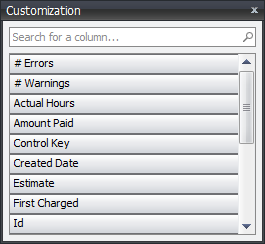
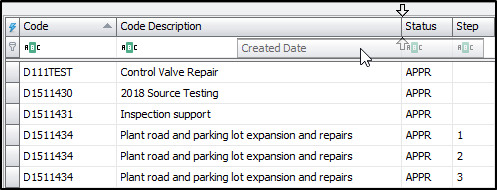
From there, drag and place the desired column from the form, to the grid. The two arrows facing each other indicate where the column header will be placed in the grid. In this example, the created date column is being placed between the code description and the status columns.
See the data grids article for more in-depth details on data grids.
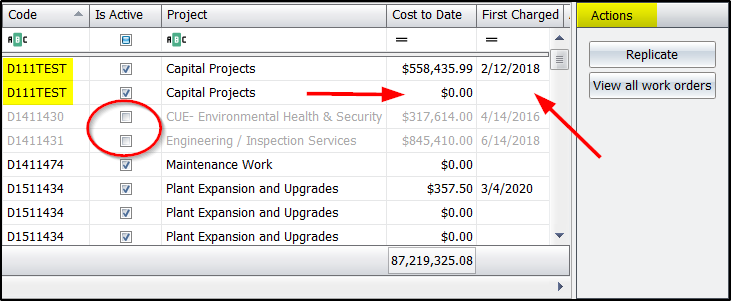
You can also perform additional tasks in the "Actions" section (to the right of the grid). The replicate button creates a copy of the selected work order(s). However, it does not store data for charges on the primary work order (the one being replicated). For example, work order D111TEST has a first charged date of 02/12/2018, and a cost to date of $558,435.99, however, those fields are blank on its duplicate. The view all work order button lets you view all active and inactive work orders. Once a work order is marked inactive, after saving and closing the window, that work order will no longer show up in the list. As such, this is a good way to retrieve data from inactive work orders, which are grayed out in the grid. You can also retrieve inactive WOs in the work order analysis menu (Analysis > Work Orders).
The tabs below the grid have a wide array of cells to add supplementary details to a record, but only allow modifying one record at a time. In some instances, if multiple records are selected in the grid then the tabs will be grayed out, thus, unmodifiable. For each cell, you can either type the details in the textbox, or select an available item from the dropdown list. Let's dive a little further in each tab.
Overview Tab
The “Overview” tab has seven (7) sections: “Main”, "Status", "Dates", "Grouping", "Cost organization", "Responsibilities", and "Physical organization".
The “Main” section contains distinct values for each work order. The code is the work order number added or imported from an external source (i.e. SAP, Maximo, etc.). The description illustrates the task(s) to be performed, while the steps are trackable breakdowns of the different work structures on the work order. They are similar to "Step1", "Step2", Step3" in CT2.

In this example, work order D1511434 is broken down into three (3) steps. As such, there are three (3) entries for the work order, each tied to a distinct step.

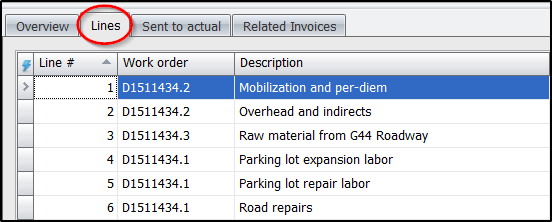
It is important to note that work order steps are not always tied to a purchase order symmetrically, or on a one-to-one basis. In this example, the purchase order has six lines with the different steps depicted as follows:
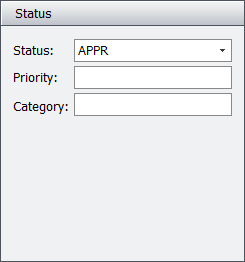
The “Status” section describes whether the work order is open and active and where its tasks are ranked in relation to other work orders. Here, the status field tells if the work order is approved, completed, etc. This field serves as a combo box, and stores newly added values to the dropdown list. The priority is generally a number used to rank one work order with respect to other work orders on a project. The category field is a numeric code used to group work orders into different classes, usually on turnarounds.
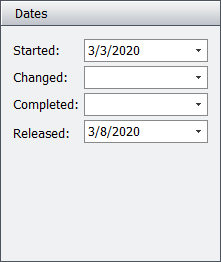
The “Date” section shows important dates that affect the work order. The started date describes when the work order originated. The changed date comes in effect when a significant change takes place on the work order. The completed date is generally when the work order is closed or when the work is done. The released date is basically when the work order is made available to be charged.
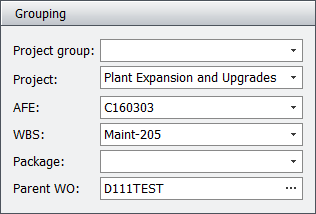
The “Grouping” section describes the different coding structures that the work order is tied to. The project group field is used when the work order is used on multiple projects. It can also be used to group projects. The project describes the proposed or planned scheme of work that is taking place. The AFE is the utility used for planning and preparing cost estimates. The WBS outlines the scope of work to be done, and serves a structure to organize, track, and report on different costs. The package is used to track work packages, or to group up work inside an AFE or project. The parent WO serves as a means to group related work orders that are used as sub-assemblies (also known as children work orders). Since children work order are dependent on the parent work order, in most cases, the parent work order cannot be marked as closed or completed until the work on all children work orders are completed.
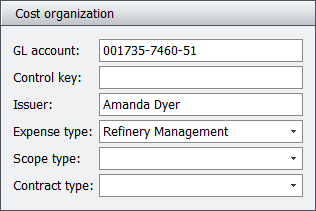
The “Cost Organization” section is used for coding the work orders. The GL account is a numeric code used to assign daily entry expenses to different GL accounts. When there is not a one to one relationship with work orders, it is used on daily entries instead of being stored in the work order table. The control key is generally the (4-character maximum) code used to indicate the completion of sub operations. The issuer is the individual who wrote the work order (used interchangeably with creator, below). The expense type field is used to separate work along tax/department lines. The scope type tells whether the work order was in original scope, EWR scope, work added after baseline, etc. The contract type is used to categorize work as “Time and Material”, “Lump Sum”, “Fixed Fee”, etc.
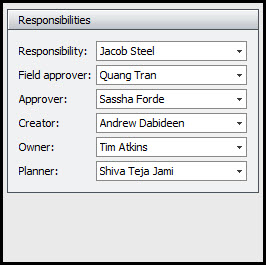
The “Responsibilities” section provides a synopsis of the different parties that are accountable for the work order. The responsibility field defines who should approve charges. The field approver is utilized when there are two levels of approvals needed. This individual verifies the workers and equipment usage is valid for the dates reported, they do not have access to any financial information. The approver is an additional field to assign an approver, when someone other than the responsibility should approve the charges. The creator is the individual who initiated the work order (used interchangeably with issuer, above). The owner is the one in charge of the work order budget and charges against the work order. The planner is the individual who estimates work scope for the work order. As depicted below, one individual can serve in multiple capacities with respect to accounting for the work order and its underlying charges. All of these fields are populated from the responbilities table
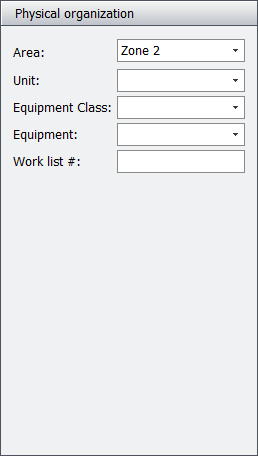
The “Physical Organization” section describes the different physical structures that the work order is tied to or affects. The area is the physical grouping of units within the refinery, and is sometimes used for large zones or overlapping units where the work takes place. The unit is a refinery processing unit (i.e. coker, crude tower, etc.), or basically a standalone grouping of equipment that all performs a function together. The equipment class is used to categorize equipment codes, e.g., exchangers, boilers, electrical, instrumentation, drums, towers, etc., while the equipment filed lets you select special refinery equipment assigned to the work order. Additionally, you can use the work list # field to make reference to or list the work to be done on the work order.
Shortcut & Distribution Tab
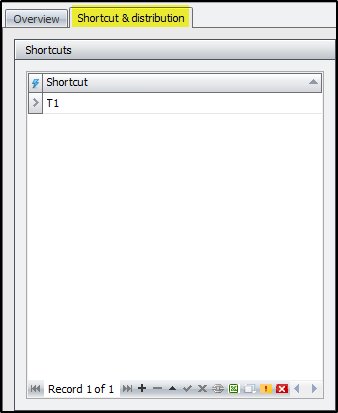
The “Shortcut & Distribution” tab affects alternative codes and cost allocation for the work order. Shortcuts set in the “Shortcuts” tab, can be used instead of the work order number when importing daily entry timesheets. in this example, "T1" is used on timesheet imports instead of the full work order code.
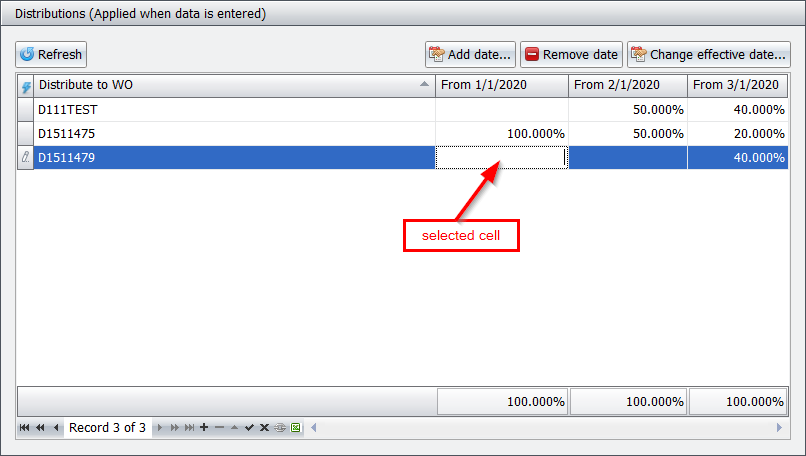
The “Distribution” section allocates costs to multiple work orders according to the set percentages. WO distribution affects records the moment they're entered and rounds to the nearest quarter hour. Click the append button to add a new row, then specify the work order that you'd like to distribute the charges to. Afterwards, click "Add date" to add a new column for the effective distribution date. In the example below, all charges on the work order in January 2020 will be distributed to WO "D1511475", while the charges in March 2020 will be distributed on a 40-20-40 basis for the three list work orders. Date columns are ordered chronologically, regardless of the order in which new date columns are added. To remove a date, select a cell with distributed percentages and click "Remove date". To change the effective date for a column, select a cell with distributed percentages and click "Change effective date". If no date is specified, the column will read "No date" (depicted in the "Report Splits" section below).
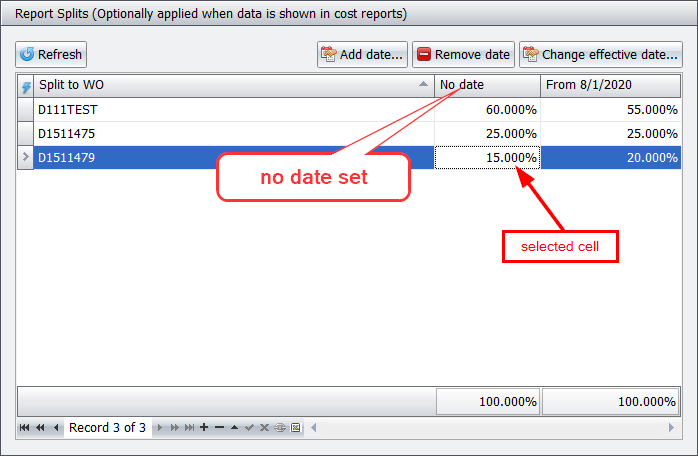
The “Report Splits” section allocates costs to multiple work orders when running reports and ‘Split work orders’ is ticked in the prepared data. Percentages are applied without rounding and the charges only show up on reports and are not recorded on the listed work order. Similar to the preceding section, you can remove a date by selecting a cell with distributed percentages and clicking "Remove date". You can also change the effective date for a column by selecting a cell with distributed percentages and click "Change effective date". When "No date" is set, all the records prior to the first dated column will assume the allocated split. In this example, all records prior to August 1, 2020 will be split on a 60-25-15 basis.
Importing Work Orders
Work orders can also be imported into CT3. This is the preferred method when adding WOs in bulk or just adding several WOs simultaneously.
To import work orders: click on Tools > Import > Work Orders.
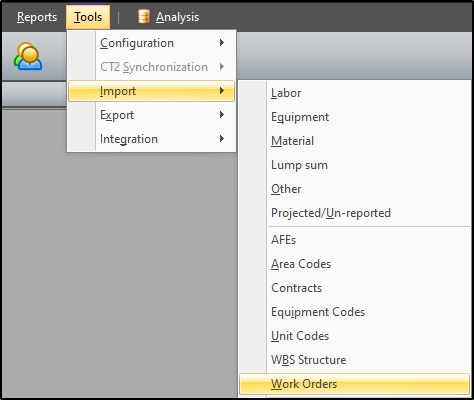
You can add a new preset if none is established for that company or edit an already established preset. You can also remove, duplicate, import or export presets if necessary.
![]()
The “Data Source” section lets you locate the directory path for your import file by clicking on the ellipsis. You can also choose which sheet number to import from and set the number of rows to skip to accommodate headers, etc. Upon saving the import preset, it displays the assigned file type in the title and allows update preset location to a file or folder for future imports.

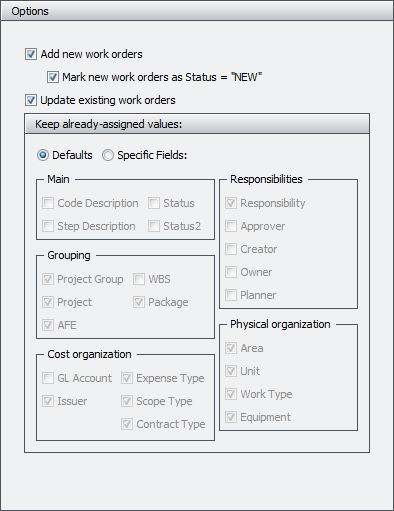
The “Options” section governs how current and future imports affect each other and determines if new WOs should be added, existing WOs updated, and how assigned values are stored.
The “Fields” section handles the underlying details of the import. Here you add the desired fields to import and assign the position to correlate with the column in your spreadsheet. Click the “Add field” dropdown to add a field and the remove button (red button to the right) to get rid of a field. You can also set a different font case for each field.
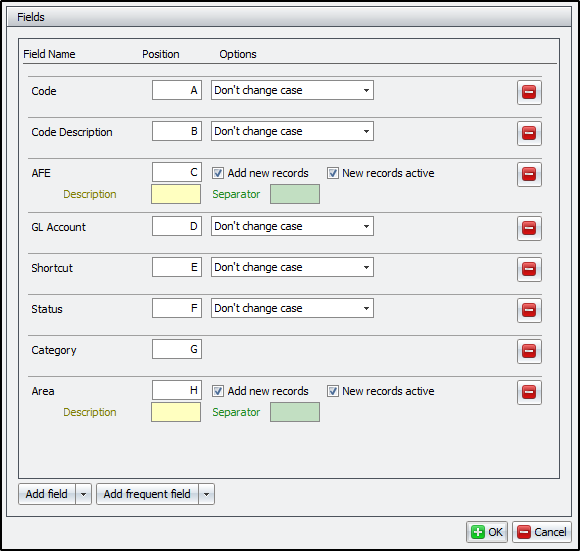
Once the preset is prepared, click “OK” to save. From there click “Import” to import the data then review and confirm the import.
This concludes the different set of activities on the work order window.
