A labor timesheet is basically a timesheet with records of the hours employees work during a given period (day, week, month, etc.). The import screen serves as an efficient tool to capture contractor timesheets, as large volumes of data can be imported in an instance. This article will explore setting up your import preset and importing a labor timesheet for a given work week.
Click HERE for a Training Video on this subject.
When importing timesheets, first prepare your source document with the pertinent data, then proceed to the import screen and import your timesheet. The source document is usually excel, however, the CT3 software support other formats such as ".csv" and ".txt" files as well. We will use excel files in this exercise.
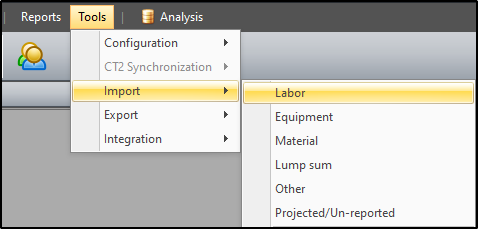
To import a labor timesheet, click on Tools > Import > Labor.
Import Preset Commands
For first time users, click on "Add" to add a new import preset, then fill in the underlying details for the preset and click "OK" to save it.
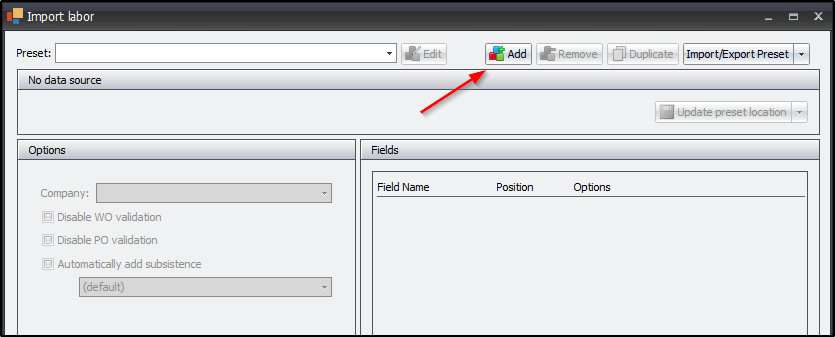
To delete an import preset, select the desired preset from the dropdown and click on "Remove".

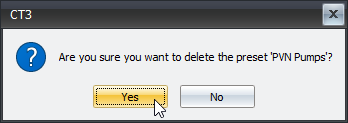
Afterwards, click on "Yes" to confirm deletion.
To create a copy of an import preset, select the desired preset from the dropdown and click on "Duplicate".

Afterwards, fill the new name for the preset and click on "OK" to save it.

The "Import/Export Preset" dropdown is used to transfer presets from one instance of CT3 to another.

Just click the dropdown and select "Import" to import an already exported preset or click "Export" to share the selected preset.

To modify the perimeters of an import preset, select the preset from the dropdown and click on "Edit".

Let's now explore each section of the import screen and import a labor timesheet.
Data Source
In the “Data Source” section you can set the directory path for the file you'd like to import by clicking on the folder or the ellipsis in the "File:" textbox. If you select a folder, the directory path for that folder will be stored as preset location (i.e. C:\Users\YourName\Desktop\24-Carat Timesheets). If you select a file, then the file will be stored as the preset location (i.e. C:\Users\YourName\Desktop\24-Carat Timesheets\24-Carat Labor 12-02-19 to 12-08-19.xlsx). You can also set which sheet number to import from and set the number of rows to skip, on the spreadsheet, to accommodate headers, etc. The settings "Sheet#: 1" will import from the leftmost sheet in the spreadsheet, regardless of which sheet has the nomenclature "Sheet1". The settings "Skip rows: 2" will only skip the first two (2) rows in the selected spreadsheet, and attempt to import data from row three (3), onwards.

Once the import preset is saved, it displays what file type is being used, and allows updating the preset location to a different file or folder. If a folder is stored, an error is displayed when you hover over the X, since you cannot import data from a folder. You must first click on the ellipsis and select a file in that folder to before being allowed to import. If a file is stored, you can click on the search icon to look up sheet names and select the desired sheet to import from.

Options
The “Options” section handles company assignment and validation metrics for each preset.
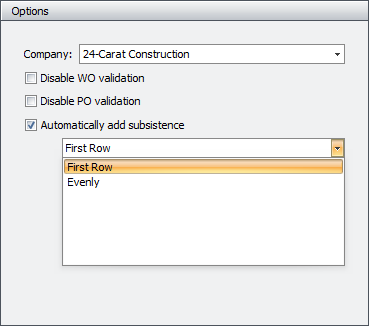
Here you can select the company, disable WO/PO validation and determine whether subsistence is automatically added with each import. When timesheets are imported, the affiliated work order(s) and purchase order(s) are generally validated to verify the bona fide relationship and accuracy of data and charges. For example, if a PO has 2 lines and the timesheet imported has records on "line 3", then there will be a "Could not find line on PO" warning. Similarly, you may get error messages or warnings in other circumstances.
If the "Disable WO validation" checkbox is flagged, the system will NOT:
- Check for WO status/status2 or AFE closed date
- Check if WO status exists and has “Accept Daily Entries” marked
If the "Disable PO validation" checkbox is flagged:
- All errors/warnings generated when filling the PO are dropped
- Don’t verify the WO exists on the PO
- Don’t require a PO is filled in
- Checks for WAPPR/CLOSE status on PO are dropped.
If the "Automatically add subsistence" checkbox is flagged, for each employee/date combination:
- Find the first used classification
- If employee has a dated/charge rate with a DailySubsistence or the classification has a DailySubsistence filled:
- When “First Row” is selected:
- Put the full Subsistence and SubsistencePay amounts on the first row/WO for the date for the employee. For example, If John Brown's daily per diem is $100.00 and he works on 10-15-2020 for 10 hours, and his hours are split across 4 work orders, the full subsistence will go to the first line, regardless of how many hours were allocated to each work order.
- When “Evenly” is selected:
- Subsistence is split based on hours percentages (if no hours, distribute evenly), and distributed to the nearest penny (while adjusting last row for rounding error). For example, If John Brown's daily per diem is $100.00 and he works on 10-15-2020 for 10 hours, and his hours are split across 4 work orders, the subsistence will be split across each work order, based on the hours allocated to each work order (i.e. $30, $25, $30, $15).
Fields
The “Fields” section deals with the technicalities of the import, and lets you decide what fields to import from the source document. Be vigilant while selecting fields, as the "Position" assigned to each field should directly correlate with the column in the spreadsheet. Click the "Add field" button to add a field from the holistic list of fields and the "Add frequent field" button to add more predominantly used fields. Conversely, click the 'remove' button (red button to the right) to delete a field from the list. Afterwards, click "OK" to store the selected fields.
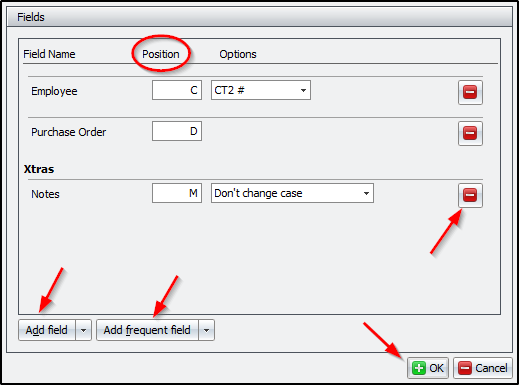
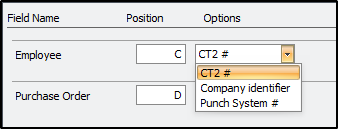
Some fields can be further calibrated, to include specificities. For example, the dropdown, the "Employee" dropdown lets you choose between CT2 # (system generated), company identifier (manually assigned), and Punch System # (imported with punch data) for each employee.
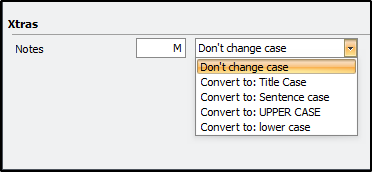
Additionally, you can set how records display after they're imported. For example, the "Notes" dropdown lets you choose whether to leave data in the case it is imported or convert it to a given case.
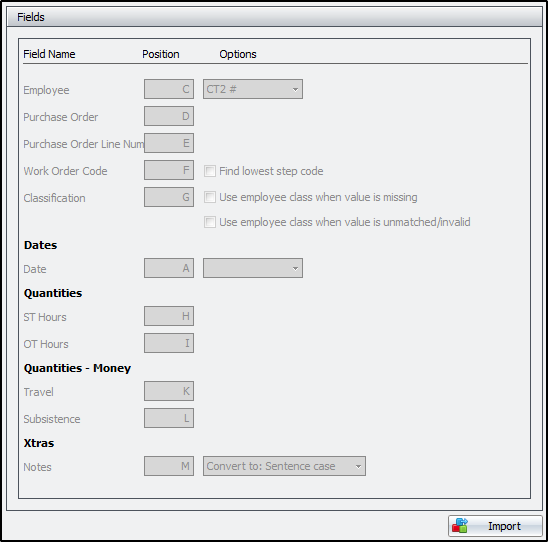
This is a sample import preset with the fields that will be used from the labor timesheet:
Importing the Timesheet
To import the timesheet, first select the file in the "Data Source" section (discussed above), then click on "Import". The sample data used in this imported can be downloaded here (24-Carat Labor 12-02-19 to 12-08-19.xlsx).
After clicking import, you will be prompted to review the import data, and fix the errors or warnings highlighted in the "Validation Summary" box. The "Description" column outlines what discrepancy is found, the "Field" column tells where the discrepancy is located and the "Count" column tell how many of each discrepancy was found. In this import, there is 1 error (employee number missing) and 2 warnings for excessive hours (anything above 16 hours in a calendar day). Clicking on the eye in the “Count” tab will take you directly to the record(s) in the grid below. Clicking the box next to the eye will higlight all lines in the data effected. The “Has Errors” and “Has Warnings” checkbox for each record is also flagged, showing the respective finding. Another warning displayed that the purchase order charged, is over 80% spent. In the "PO Summary" box you will find PO information for all POs reported in the import file. In this example, the timesheet totals $3,946, which is added to the exsisting cost to date on the PO, leaving $2,547.40 left on the PO. 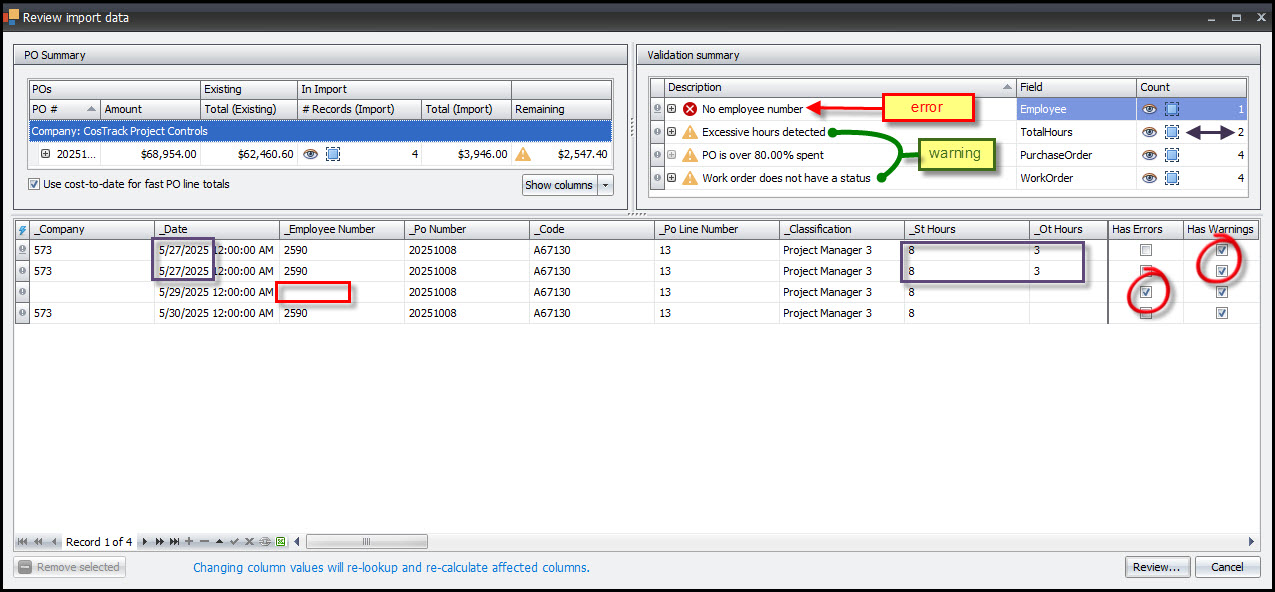
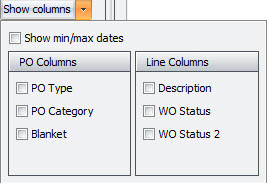
There are additional column available to view clicking "Show Columns" and checking any that you wish to include.
To correct the discrepancies, you can modify the records in the "Review data import" grid or cancel the import, make the required changes in source document, then reimport. Once everything valid on import you will see “All records valid” on the validation summary.

Upon clicking “Review” you will get a synopsis of the import data, showing the number of entries with the affiliated hours and dollars for each day.
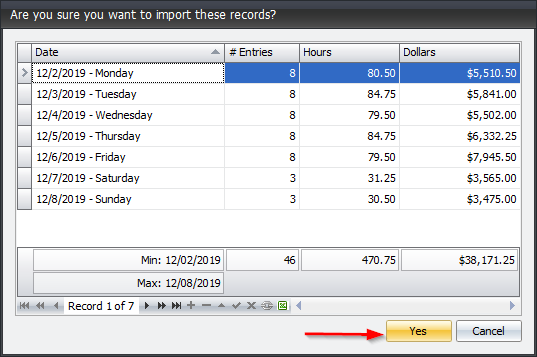
Click “Yes” to confirm you want to import the records and complete the import.