A physical organization coding structure is generally used for grouping different areas, individual (or a collection of) units and major equipment items within a refinery. These coding structures, to a degree, set up a clearly defined path that outlines where on the plant work is being done. Let's explore each physical organization coding structure.
Area Codes
Areas codes are used to define specific regions or zones on the refinery. They can be big, small, or crosscut; however, each area generally provides means of specifically identifying certain portions of the plant, or its related groups of activities. Being one of the primary physical structures on the job site, it is recommendable to add or import area codes before adding unit codes, and equipment code, so that the area codes are available for selection when adding the others.
To add an area code, click on General > Area Codes.

Click the append button (+) on the navigation bar to add a new record. You can also use the buttons to the right of the append button to modify or delete the selected record(s).
Once a new row is added you can fill the supplementary details for each area. The client number serves as the equivalent of the system identifier in the other menus. The name distinguishes the different areas. The identifier is used is for matching values from external imports and can also be used as shortcuts on reports. The responsibility is generally the area manager or the individual who makes supervisory decisions for that area.
After adding the records, click on “Save” to accept changes as the data is not automatically saved after records are modified or deleted.

Unit Codes
Unit codes are used to distinguish the different processing units in the refinery. A typical refinery will have several processing units and each unit plays a special role in processing raw materials into finished products.
To add a unit code, click on General > Unit Codes.

In addition to filling the client number, name and identifier, you can assign each unit to an area by simply selecting a value from the "Area" dropdown in each row.
Equipment Classes
Equipment classes may be used to group equipment codes for different reporting purposes. To add an equipment code, click on General > Equipment Class.

There maybe hundreds of individual pieces of equipment that are all considered "Blowers and Fans". By assigning an equipment class, you can group those items together.

Equipment Codes
Equipment codes are used to identify special refinery equipment that are used for specific purposes and processes. This includes process equipment, fixed equipment, rotating equipment, etc.
To add an equipment code, click on General > Equipment Codes.

Here you can assign each equipment to a specific unit, area and equipment class.

Importing Area, Unit and Equipment Codes
Physical organization coding structures can also be imported into CT3. This is the preferred method when adding them in bulk. Due to their similarities in nature, we will depict the import process using the equipment codes import preset.
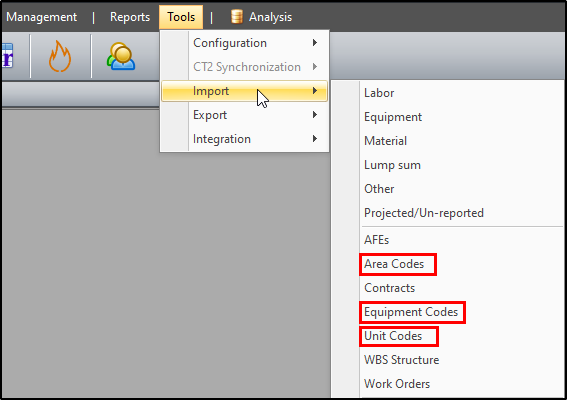
To import a physical organization coding structure, click on Tools > Import > (Area Codes, Unit Codes, or Equipment Codes).

You can add a new preset if none is established for that company or edit an already established preset. You can also remove, duplicate, import or export presets if necessary.
![]()
The “Data Source” box lets you locate the directory path for your import file by clicking on the ellipsis. You can also choose which sheet number to import from and set the number of rows to skip to accommodate headers, etc. Upon saving the import preset, it displays the assigned file type in the title and lets you update the preset location to a file or folder for future imports.

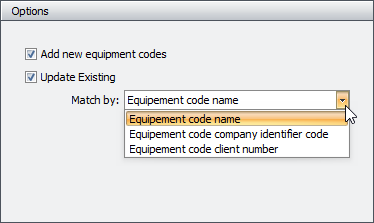
The “Options” box governs how current and future imports affect each other and determines if new codes should be added, and how existing codes should be updated.

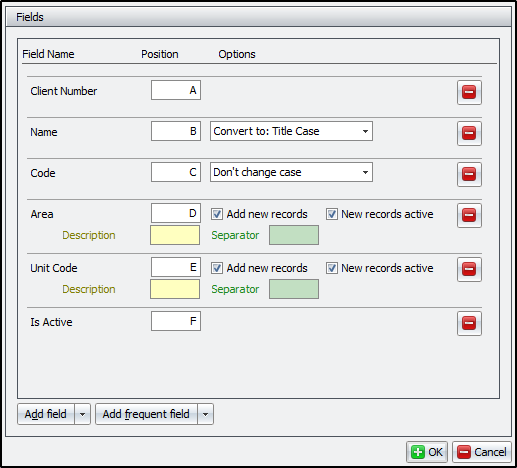
The “Fields” box handles the underlying details of the import. Here you add the desired fields to import and assign the position to correlate with the columns in your spreadsheet. Click the “Add field” dropdown to add a field and the remove button (red button to the right) to get rid of a field. You can also change font cases for select fields.

Once the preset is prepared, click “OK” to save. From there click “Import” to import the data then review and confirm the import.