Snapshot Reporting is located in Reports>Snapshot Reporting. A snapshot target is its own database and can have projects from multiple different sites. This is a copy of the data that will then be utilized to feed Power BI reports. Snapshots are expensive when it comes to data storage and time to run. It is important for users to manage these files closely and remove any unnecessary snapshot reports. Unlike every other screen in CT3, there is no SAVE icon in snapshot reporting. Changes are stored live as you make them and closing the Edit projects screen will not prompt confirmation of any changes.
Getting snapshot reporting set up for a site does require IT involvement, connection strings are set up under the hood. Without setting up, the screen will appear with no databases available.
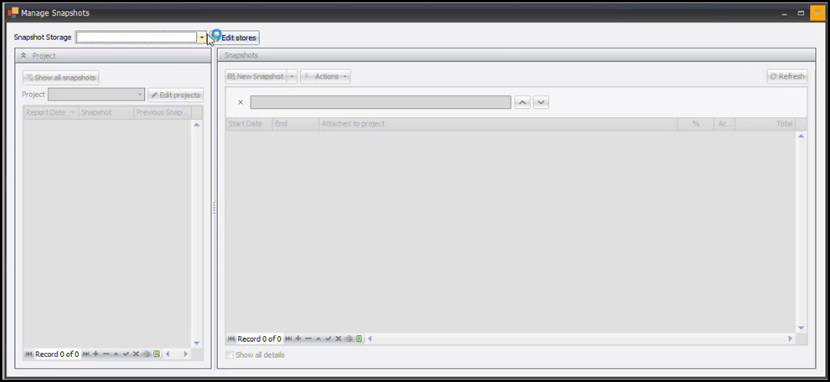
Once the connection string has been configured the Snapshot Storage bar will disappear and the Edit Projects button will be enabled, click that to get started. From the edit projects screen, click the plus sign (+) to add a new project.
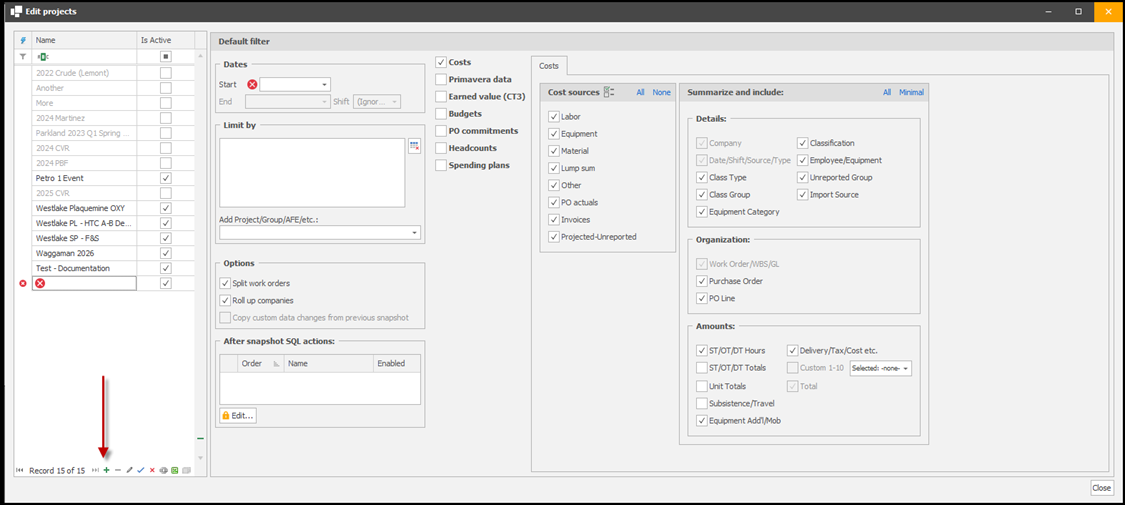
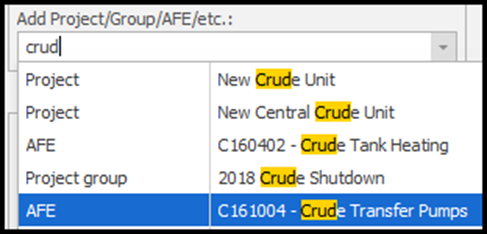
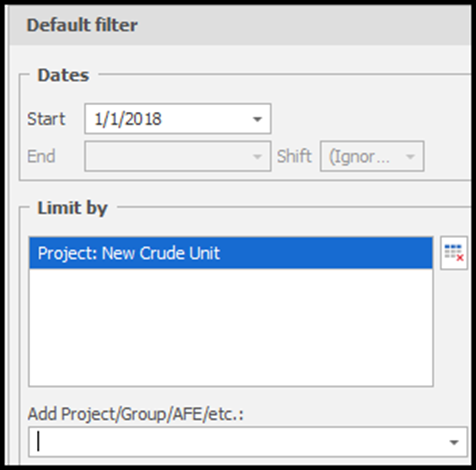
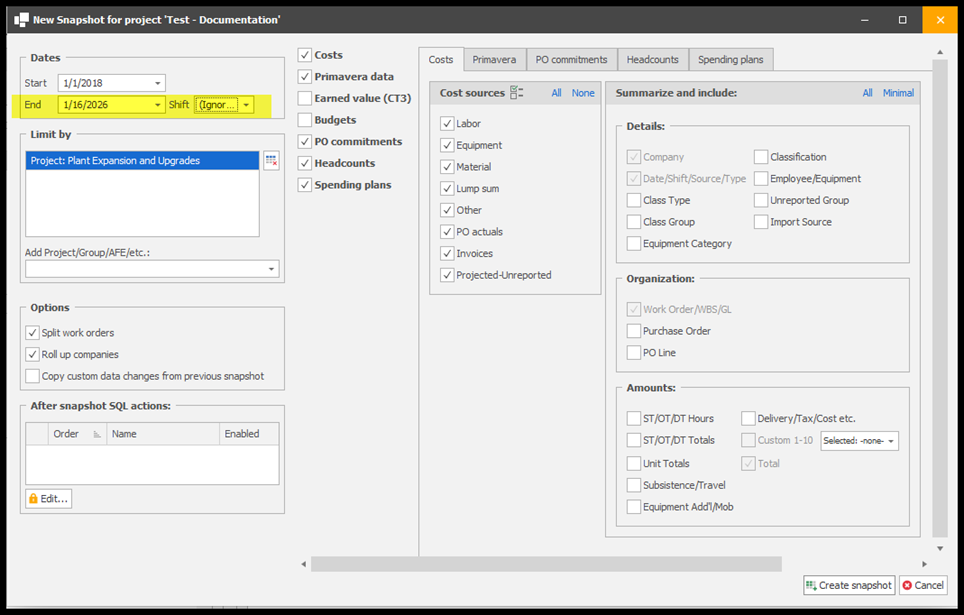
Name the project and enter the definitive start date. Next you will choose how to limit the data that is being pulled into the report, like generating a prepared database. One key difference is the ability to select your Project, Project Group, Expense Type, Expense Group and AFE are all in one place. By typing in the search box beneath Add Project/Group/AFE/etc., you will find that word across any of the filter options. You then click the filter you want to apply to the dataset.
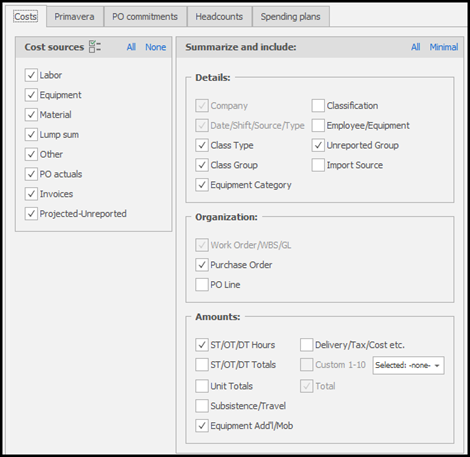
Next you can select what data you want to include in the dataset. As you select options, tabs will appear across the top with details to choose from for that option. In the Costs tab you can select your cost sources, but also the level of detail that is needed. For high level reporting, employee details such as name/number and classification are likely not needed. You can deselect those options, leaving the report to summarize data by class type and group. You can also opt for equipment category instead of item. You can choose to leave out purchase order line information or POs all together. And you can select what costs are itemized, instead of summarized. Summarized items shorten the time it takes for the snapshot to run, and the amount of storage that the report will consume.
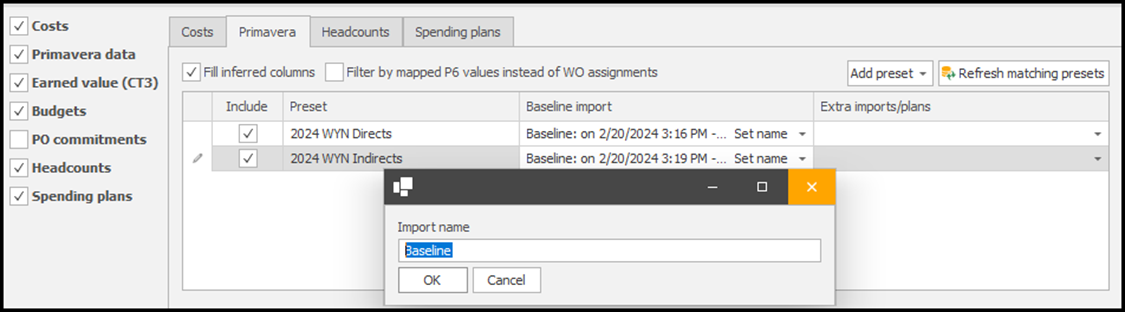
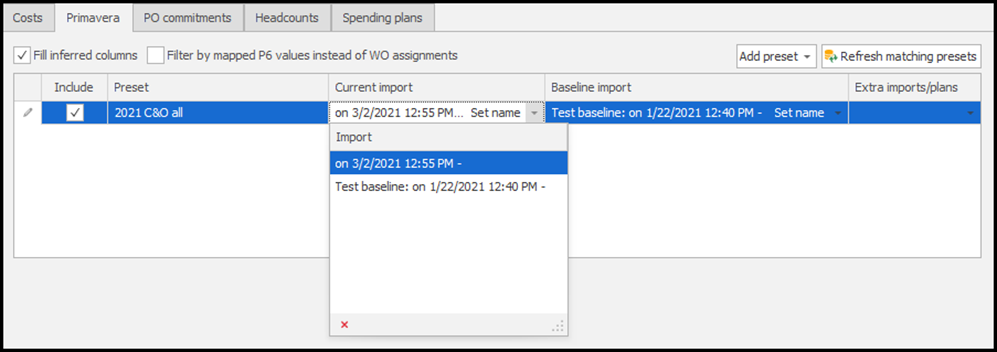
When you select Primavera Data and click Refresh matching presets, any P6 imports that have touched the filtered criteria will be available. Inferred columns means that you would like the software to make some assumptions from the coding that is already established. An example would be, most activities in the schedule that are assigned an equipment class of Rotating Equipment are assigned to WO# 1234567, however there are a group of activities, assigned the same equipment class, that have no work order assigned. By checking this option CT3 will infer that WO# 1234567 should have been assigned to those activities and will assign it when imported.

When working with a schedule that is missing work orders, you can choose to utilize the values that are mapped in the P6 schedule import. For example, if work orders aren’t used in the schedule, by checking this option, you can map to the project instead. By clicking the dropdown under Baseline import you can find all possible imports that have been stored. By clicking Set name, you can name the imports to make it easier to identify in the list. Otherwise, they are labeled according to import date and time. You may also include additional imports that you want to pull into the dataset by selecting from the Extra imports/plans dropdown.
Selecting Earned Value (CT3) when you have completed previous imports from Primavera, captures the total earned value as of the current import. CT3 then compares it to what was stored at the last import and will calculate how many hours were earned based on the effective date you set.
Selecting Budgets will allow anything built in the budget screens that are tied to the filtered criteria to be collected.
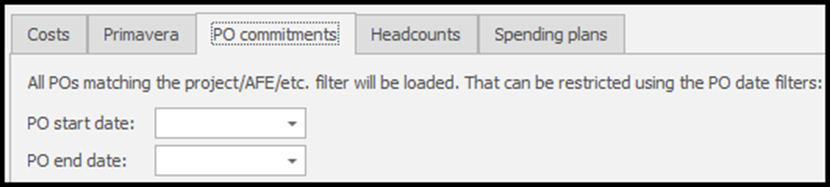
On PO commitments, any purchase order tied to a work order that is assigned to the filtered criteria will be collected, you are also able to limit dates in this option.
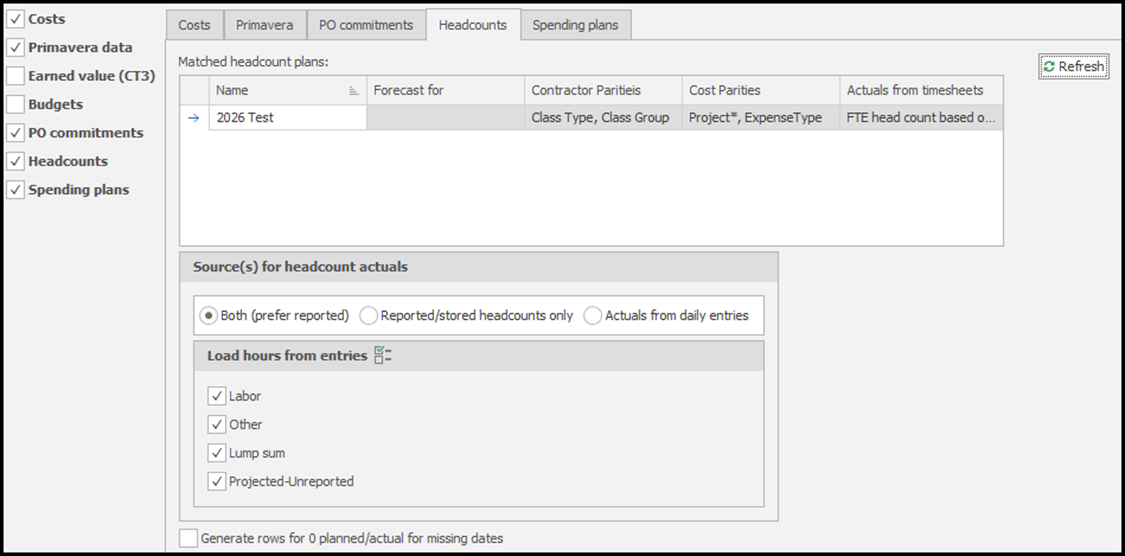
By checking Headcounts, any plans associated with the filtered criteria would display in the box. You can then choose the source of the actuals that will be counted. Selecting Reported/stored headcounts only will pull from the contractor reported headcounts loaded in CT3. Choosing Actuals from daily entries will calculate the headcount numbers based on the contractor timesheets that were submitted and projected/unreported entries. Selecting Both (prefer reported) uses the two options together, prioritizing reported/stored and using actuals from daily entries only when there are no records in the Headcount Details for a given day. You can also select which sources hours will load from.
When checked, Spending plans tied to the filtered project will display in the window and that data will be pulled into the snapshot as well.
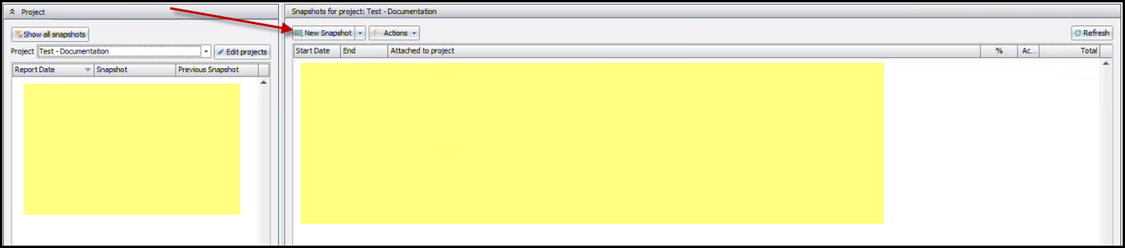
Once all selections have been made for that snapshot project, click Close in the lower right corner, all changes were saved as you made them. Back on the Snapshot Reporting screen, select the project that was just created. The lists will be blank, as no snapshots have been created yet. Click New Snapshot to begin a new report
You will find almost the exact same screen as the Edit project screen, with some exceptions. The End date and Shift are enabled and defaulted to yesterday and ignore, however they can be changed to any date or shift desired.
In the Primavera tab the software will search for the latest import available and choose it by default.
Click Create snapshot and CT3 will begin to gather all the data and create a database. Once it is complete, the snapshot will display in the report list fields.

The screen on the left will show all snapshots that exists, listed by Report Date – which is the End Date of the report. The next columns record the exact date and time the snapshot was created. The screen on the left is a clean list of all snapshots that are stored. You can use it to search for previous snapshots and by clicking on that snapshot the screen on the right will allow you view the details of that database, when you enable Show all details at the bottom of the screen. On the far right you can find percent complete (from Primavera), actual hours and total dollars from the data that was stored.
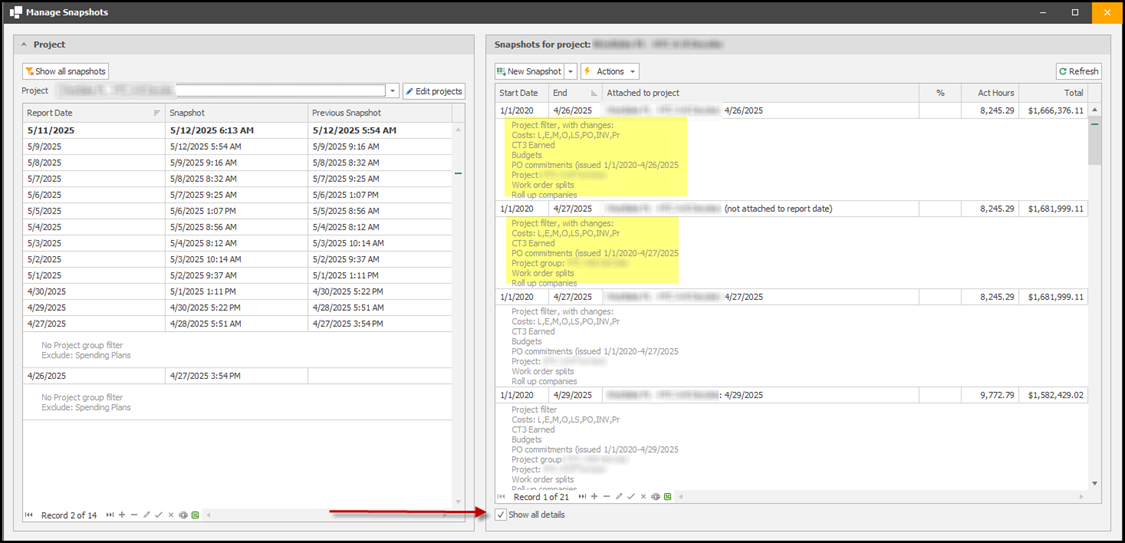
If any changes are made from the established Project filter, they will be listed in the details under that snapshot.

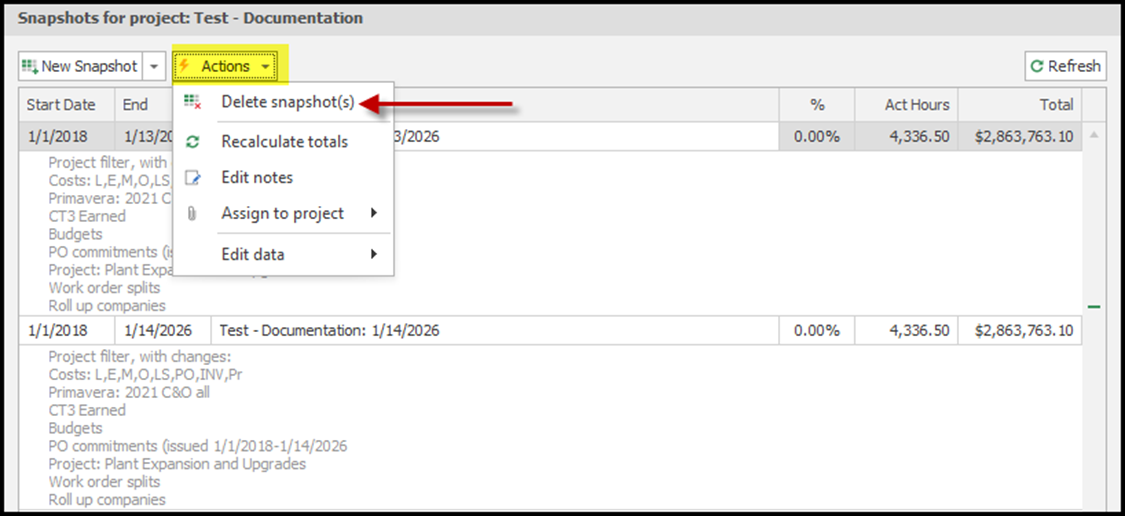
Be sure to delete any unnecessary snapshots by clicking Actions>Delete Snapshot(s).
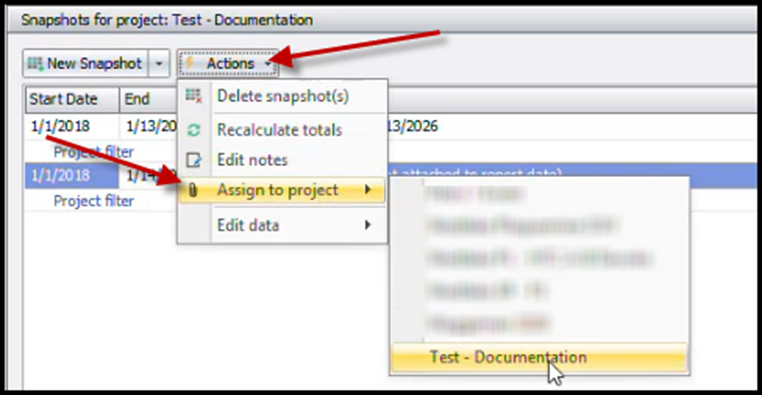
If you have a snapshot that is not attached to a Snapshot Project, you will see the note below:

To assign that snapshot to a project, click Actions>Assign to project, and select the correct project.
You now have a snapshot database to connect to Power BI reporting.