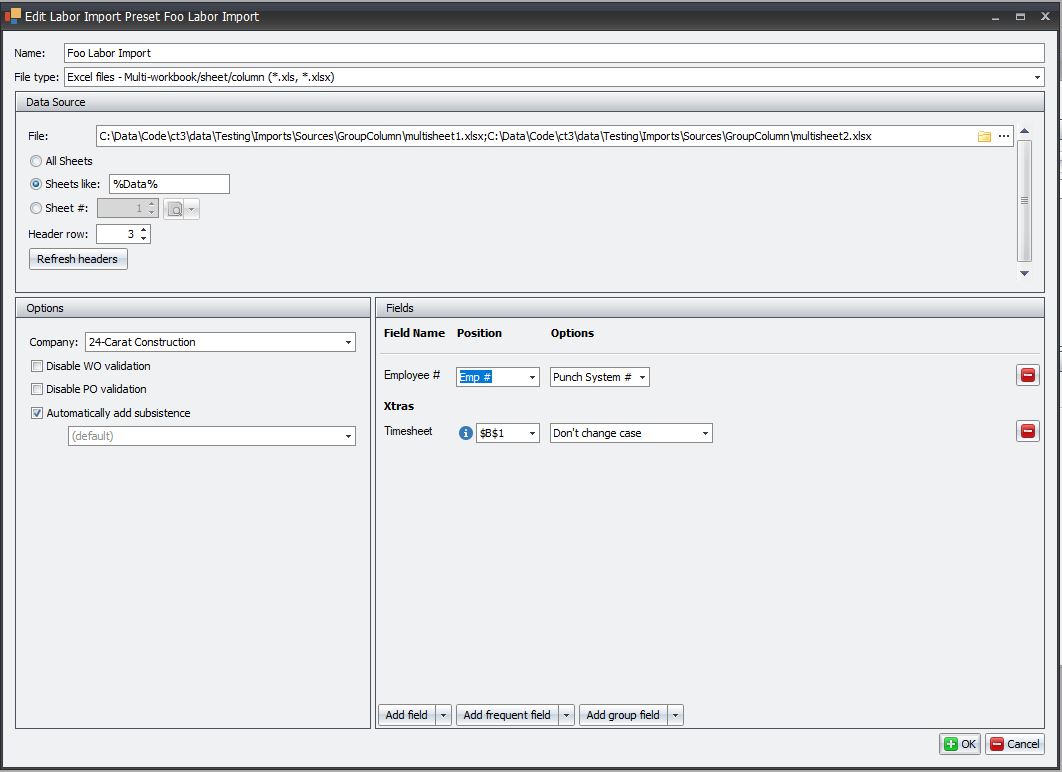
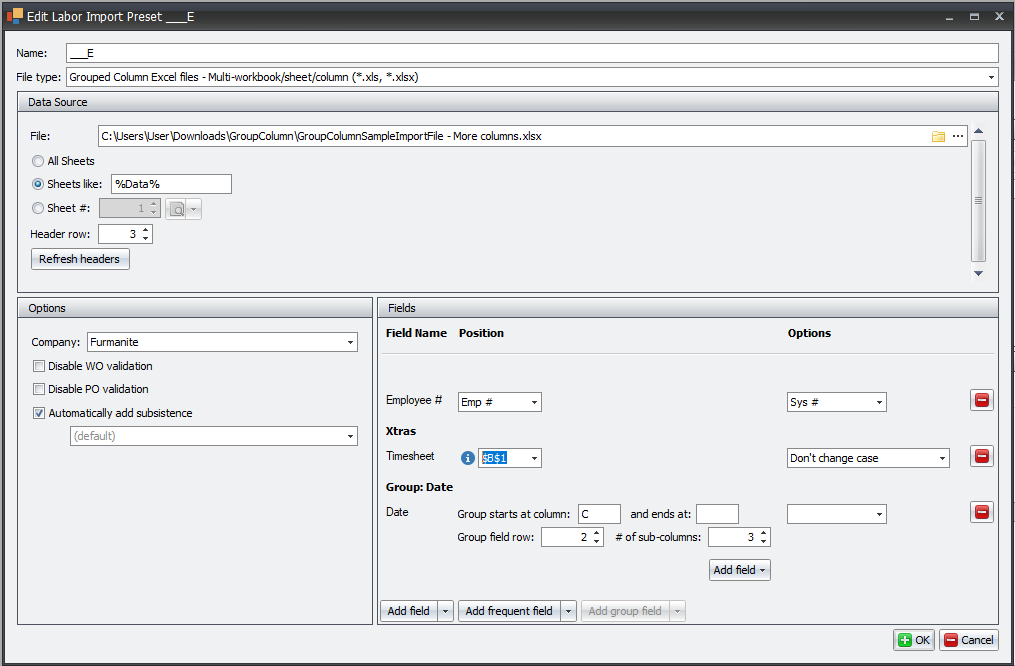
Multi-column imports presets are a subtype of import presets that allow a user to import multiple files and files with columns and sub column as is shown below. This import preset type only works with excel files (*.xls, *.xlsx) and is present on all import screens.

Data Source
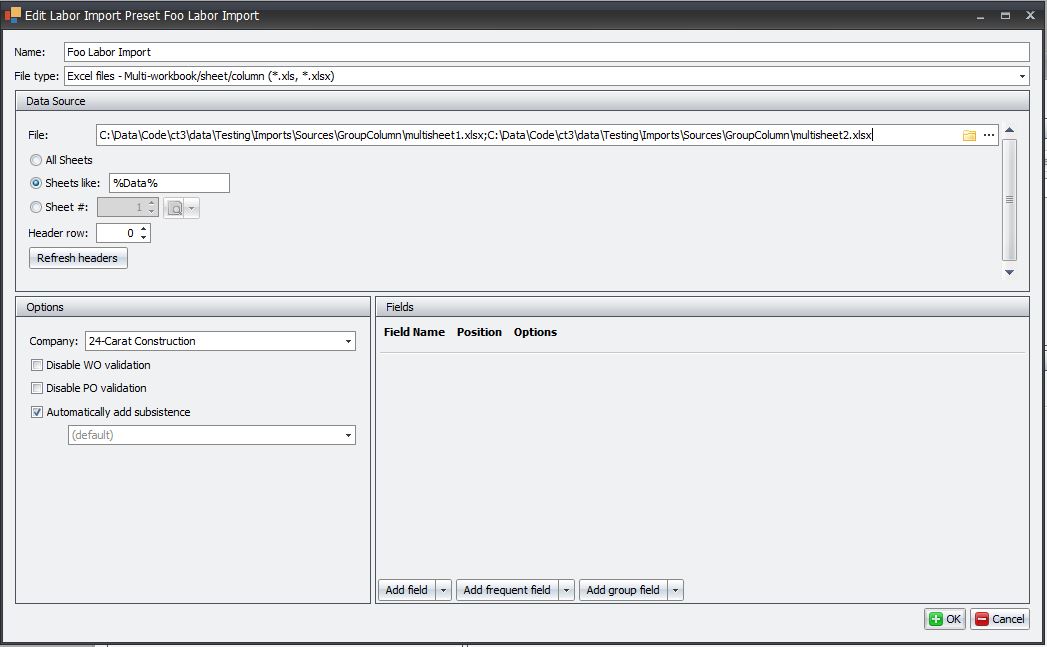
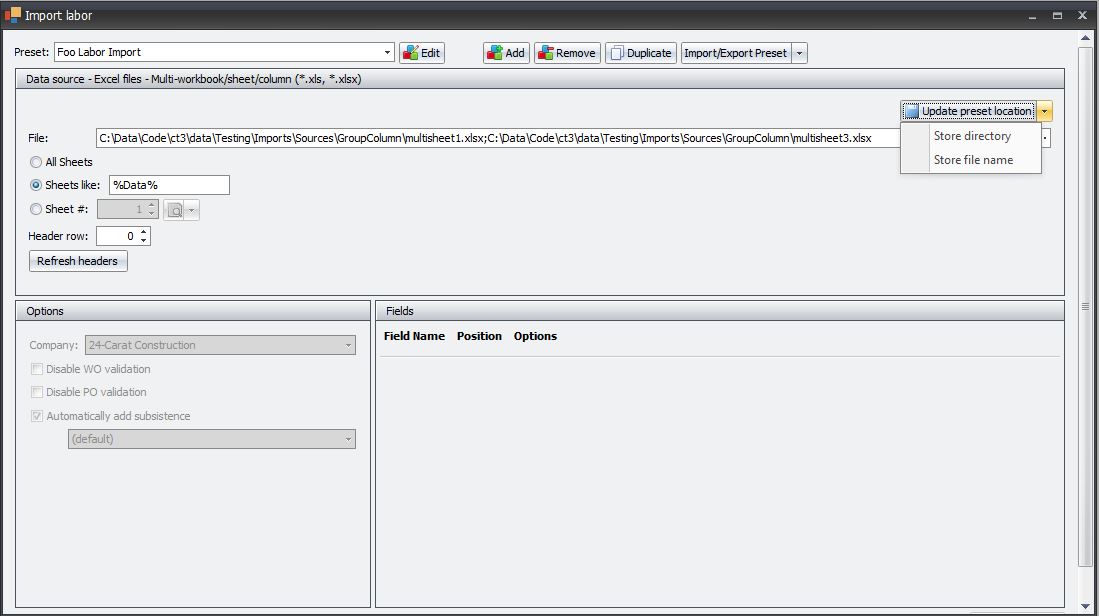
Upon selecting the option "Excel files - Multi-workbook/sheet/column (*.xls, *.xlsx)" the user will be presented with the following Data Source options. Much of the functionality of this preset is similar to other presets.
Sheet Selection
Similar to other import presets the user can select a sheet to import by sheet number or the sheet lookup (magnifying glass) but have two other sheet selection options. The first option is "All Sheets" this will attempt to pull in data from all sheet in the workbook, please note that this can bring in data that might not be intended. For instance if the user has a totals sheet there could be similar headers, shown below.
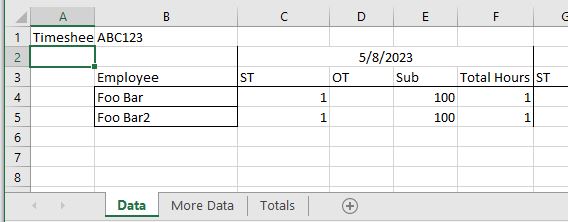
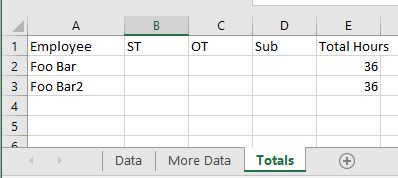
The third option for sheet selection is the "Sheets like:" text edit. The user can specify text that appears in the names of the sheets in the workbook and only import sheets with that name or a similar name. This functionality uses wildcard characters, "_" for a single character and "%" for multiple characters. In the case of the images above, a user could import the Data and More Data spreadsheets, but not the Totals sheet by using the text "%Data%". An example of the single character wildcard in use would be "_ata" would import only the Data sheet and not More Data sheet.
File Selection
File selection work almost identically to the other data sources, but with Multi-workbook/sheet/column imports the user can select multiple files to import at the same time. The user could type in the file path and name of each file they wish to import separated by a semicolon ";" or use file chooser by clicking the "..." button. In the file chooser the user can select multiple files in the same way they would in any Windows file chooser (click and drag, shift + click, control + click).
Adding Fields
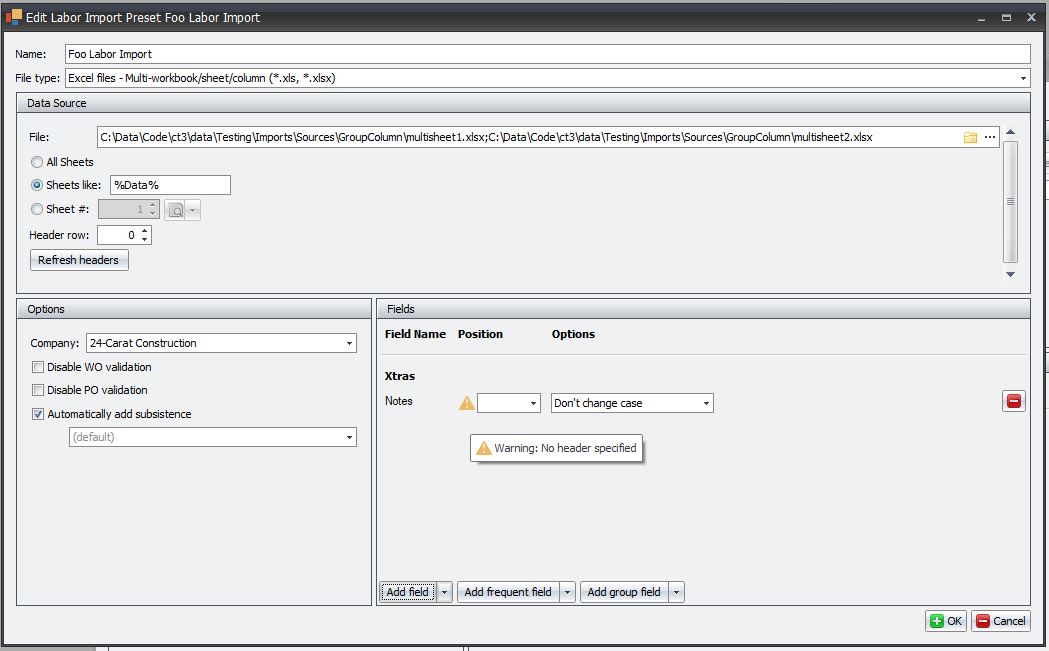
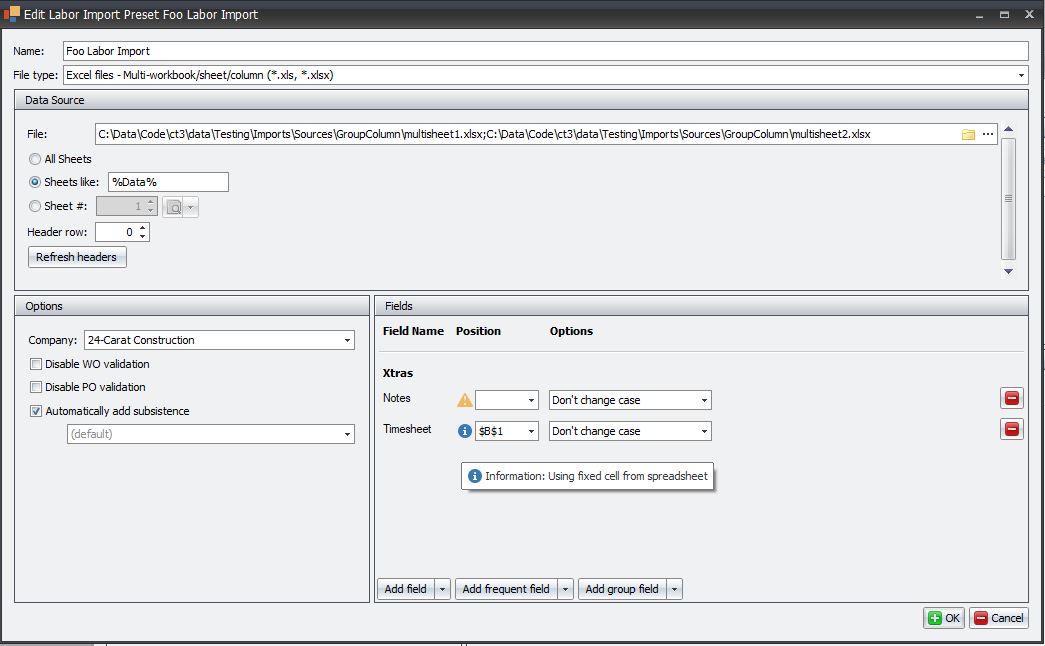
Adding fields funcions similarly to other imports by pressing the "Add field" or "Add frequent field" buttons. Instead of using columns for the position of these fields the headers of the read spreadsheet(s) are added to a drop down that the user can select from. In order to get these headers the user must enter the header row in the text edit and then press the "Refresh headers" button. The user can also enter fixed cells into the field's position editor, this is useful in the case of entering labor and having a timesheet on a fixed location on the spreadsheet so that every row of the import would have the timesheet number filled in. Fixed cells are denoted in the same format as Excel, for example $B$1.
All of the field option controls are the same as they are in regular imports.
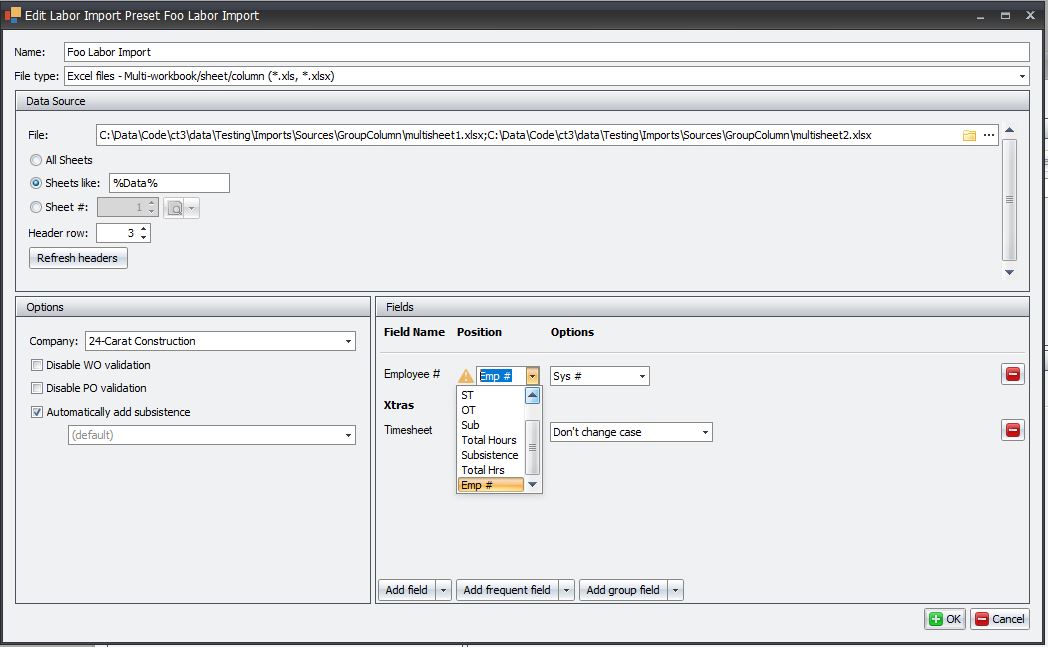
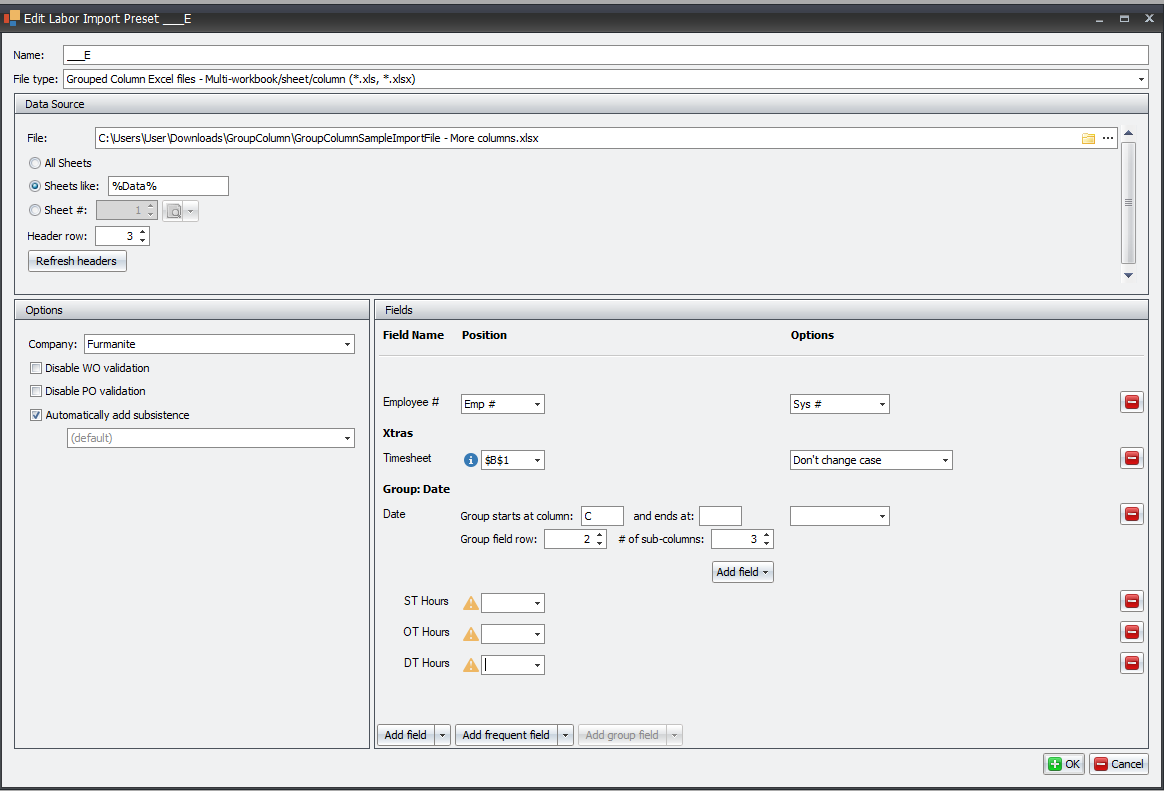
If no header is entered by the user a warning is displayed to inform them of this. An import can proceed without a field mapped correctly but that data will not be imported. Any fixed cells are marked with an information icon to let a user know they are in use.
Adding Group Columns
A group column can be added by simply clicking the "Add group field" button, any field can be a group column but only one group column can exist per preset. Once the group column has been added the user will need to specify a few detail about it, and can then also add additional fields that are grouped (and repeated) under the the group column field. After adding a group column the "Add group field" button will be greyed out as only one group column can be added to a preset.
The image above depicts adding a group field. The user needs to specify the column in which the grouping starts and the row which contains the data relevant to the field. In the labor example below column "C" is the start of the group column and row 2 contains the dates.

The "ends at" field is to specify the last column of the grouping (column R in the example above). This is helpful if there is data that follows after the grouped columns in the spreadsheet. This is not required to be filled, but there is the potential for data to be lost or incorrectly included that may need revision. The final text edit is for specifiying the number of sub columns in the group, for the example spreadsheet, this would be 4.
Below the group field text controls, there is a button to add sub-fields to the group. In the example of the spreadsheet above the fields that the user may want to add the fields for ST hours, OT hours, Subsustence, and total hours. These fields will display in the preset as being indented to show that they are part of that group column.
Removing fields
Similar to other import presets there is a red minus button to the right of each field. By clicking this, that field will be removed from the import preset. If the user clicks the red minus button next to the grouped column, in the case of this example, Date, the entire grouped column and all of its sub-columns will be removed from the preset.
