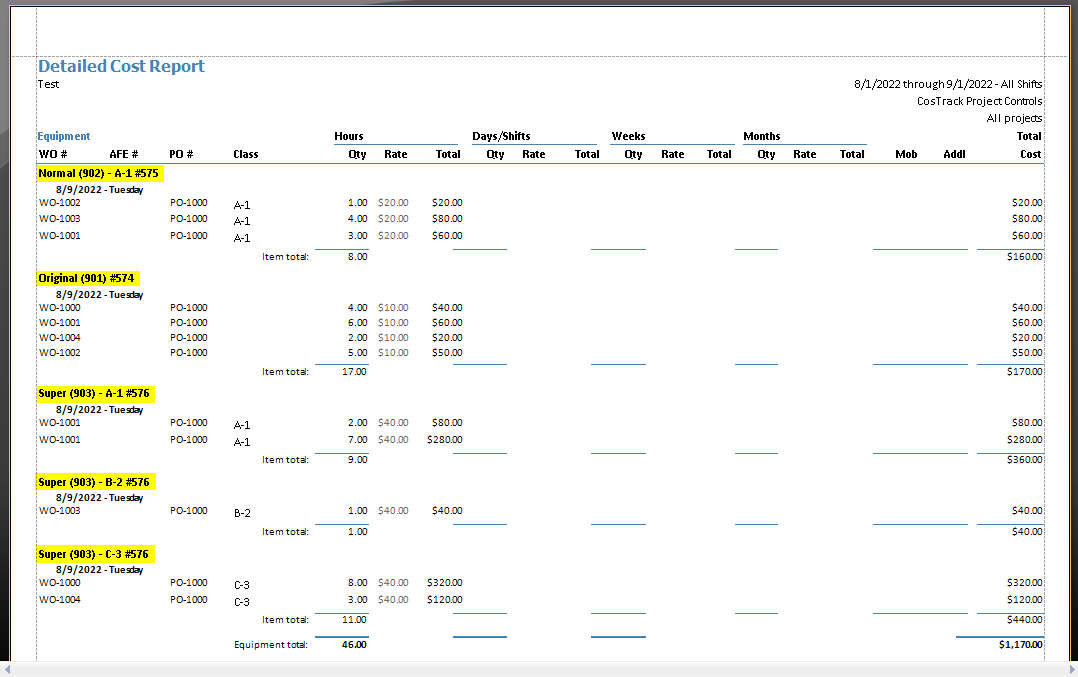
Equipment tags are for when you have multiple equipment items that are effectively the same but require tracking of specific items to apply cost to. Instead of having duplicate entries of the same equipment with unique descriptions, you can add a tag for individual equipment items that would share rates and company details.
Adding and Managing Equipment Tags
The primary way to manage and add Equipment tags would be through the Equipment -> Equipment screen.

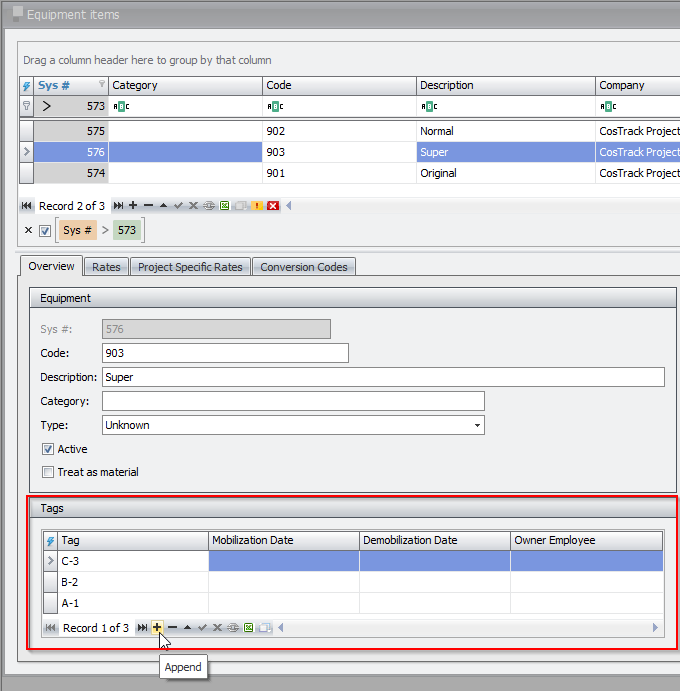
On this screen, you will find the “Tags” entry box at the bottom of the “Overview” tab for any selected row in the primary “Equipment” grid. By clicking the “+” button at the bottom of the “Tags” grid will create a new Tag. You can click the “-“ button located next to the “+” button to remove a tag from an equipment item as well. Be sure to Save on this screen after adding your tags before trying to enter costs to them.
Additionally, you can add “Tags” to new and existing Equipment items using the “Tools -> Import -> Equipment Items” menu selection. 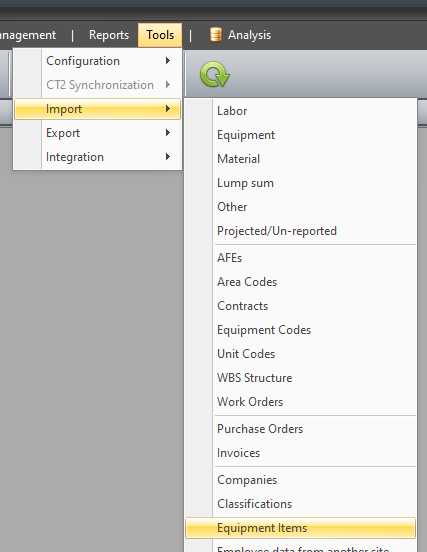
The “Import Equipment Items” screen will allow you to set up a list of Equipment items to add to a company, in this example it is set up to accept an Excel document that includes the predefined fields.
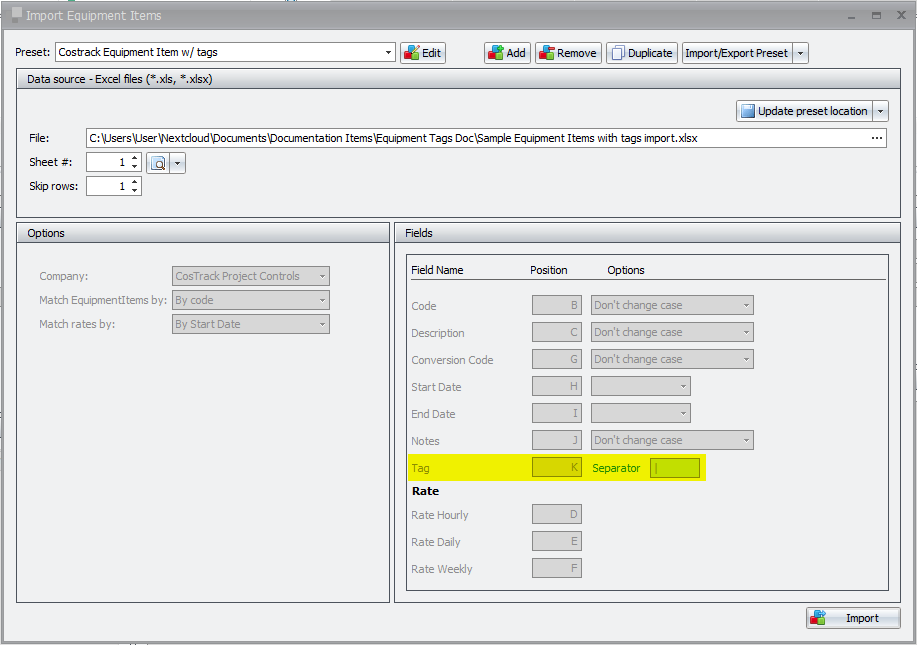
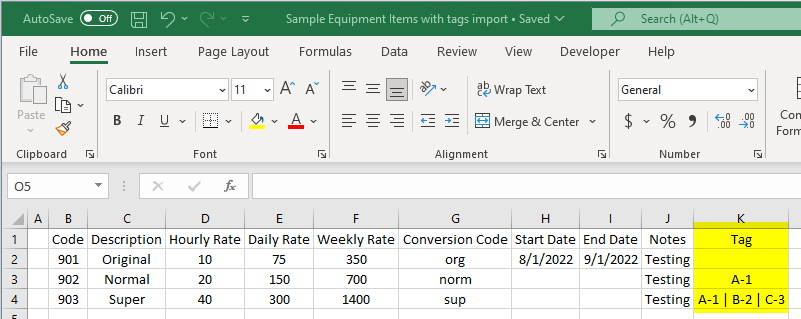
You can add multiple Tags at once by seperating each tag with whatever character was indicated as the speratator
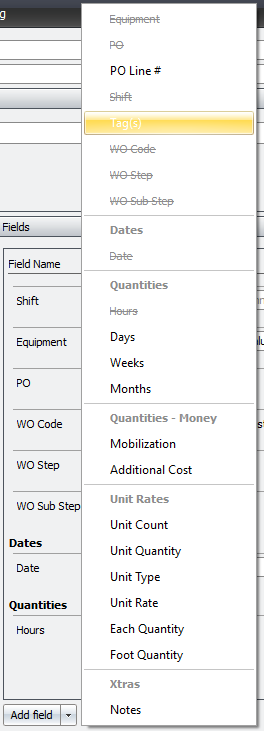
Note: If the “Import Equipment Items” data source preset doesn’t include the “Tags” field, you will need to Edit (or Add a new) preset to include the “Tags” field to your “Import Equipment Items” preset fields

Once your data source and preset field descriptions are ready, hit the Import button at the bottom right of the “Import Equipment List” window and you will see a new pop-up window that allows you to review and confirm the data before committing the information to the database. If there are any errors found with the input source data, they will be indicated on this screen and can usually be corrected in the pop-up window before saving to the database. Hitting cancel will also stop the process, preventing any of the imported data from being saved.

Entering Costs using Tags
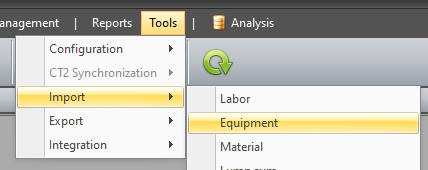
For ease of the user, when there are multiple Equipment costs to enter at once, it is recommended to do so using the “Tools -> Import -> Equipment” menu selection.
Upon selecting this menu item, the user will be brought to the “Import Equipment” window.
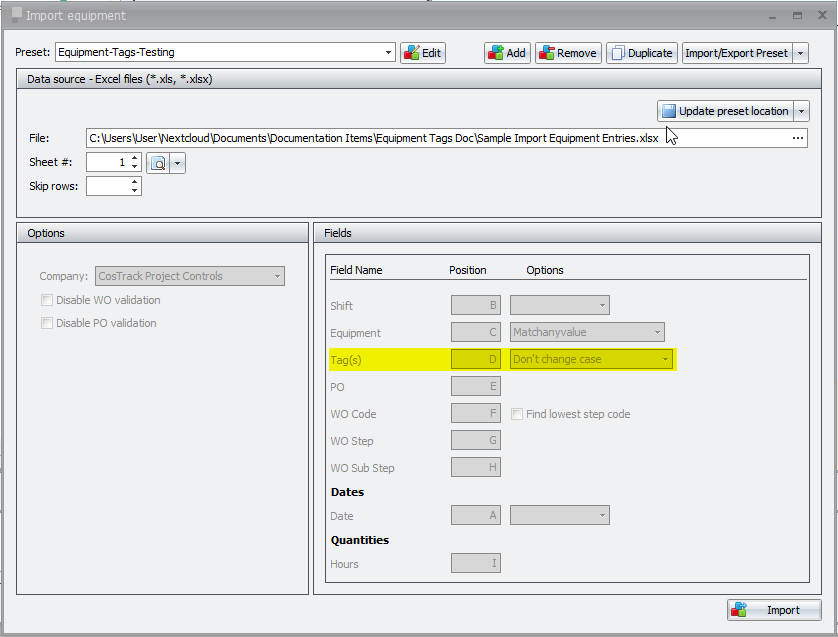
Note: If the “Import Equipment” data source preset doesn’t include it, you will need to Edit (or Add a new) preset to include the “Tags” field to your “Import Equipment Items” preset fields. (same as detailed in the note for above section for the “Import Equipment Items” screen)
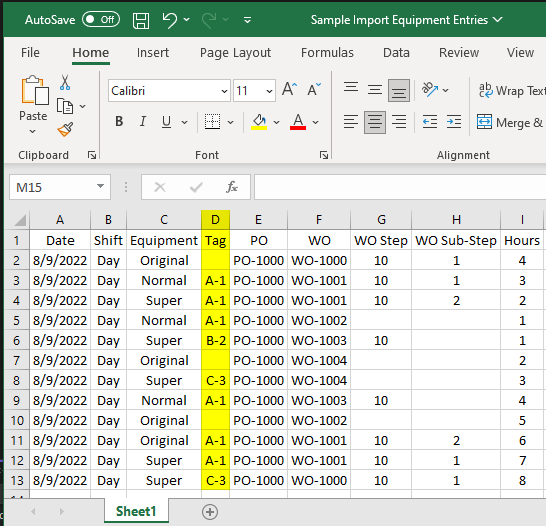
The “Import Equipment” screen will allow you to set up a list of Costs to apply towards specific Equipment using the “Tags” field. This example it is set up to accept an Excel document that includes the predefined fields.
Note: the import will display a warning/error for any Equipment item entered without a “Tag” if that Equipment item has had “Tags” saved to it OR if a “Tag” is listed that does not match an existing “Tag” for that Equipment. No error will occur for blank “Tag” entries for Equipment that do not have any “Tags” defined for them.
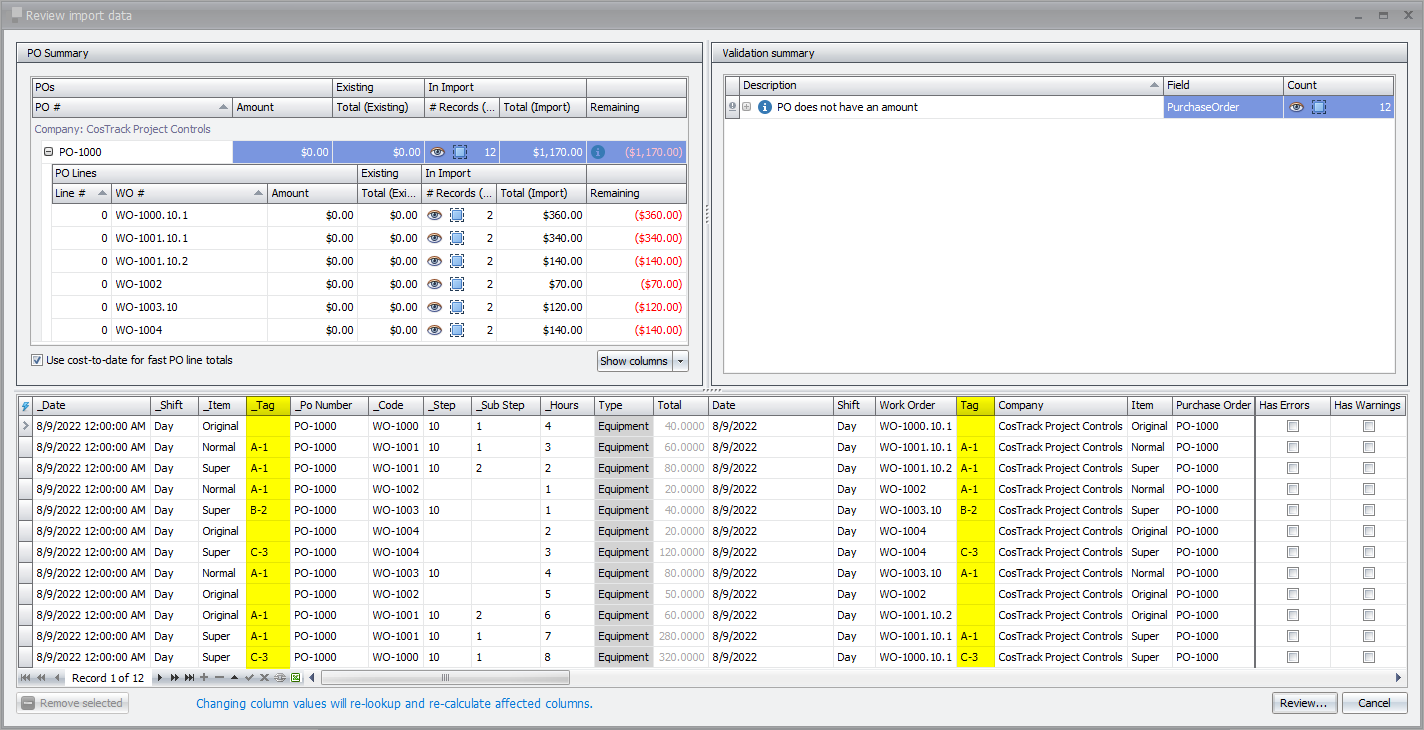
Once your data source and preset field descriptions are ready, hit the Import button at the bottom right of the “Import Equipment” window and you will see a new pop-up window that allows you to review and confirm the data before committing the information to the database. If there are any errors found with the input source data, they will be indicated on this screen and can usually be corrected in the pop-up window before saving to the database. Hitting cancel will also stop the process, preventing any of the imported data from being saved.
Another method provided to enter costs for Equipment using Tags is to use the “Daily Entries -> Equipment” menu selection, also accessible by clicking the big “E” at the top of the screen and selecting the “Keypad entry” option.
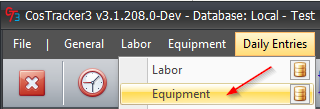 OR
OR 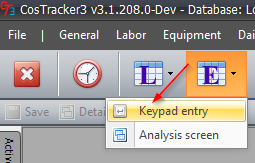
Selecting either of these options will take the user to the same screen where they will be prompted to select a date and shift for this entry. After doing so, you can click the navigation buttons on the bottom, or use the keypad style hotkeys to “Add” then “Equipment” and be prompted for what Equipment to apply the cost towards.
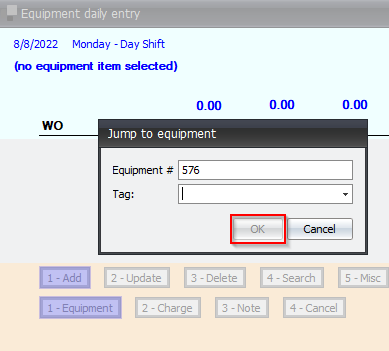
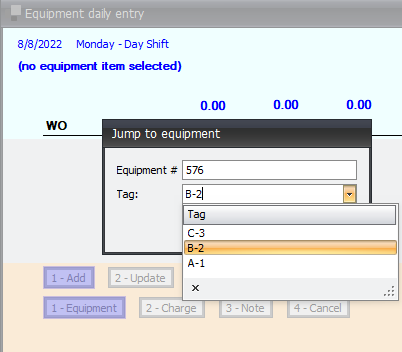
If the provided Equipment # has ANY tags assigned to it, you will not be able to continue without selecting a Tag from the dropdown menu
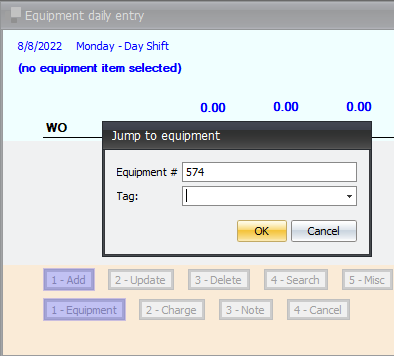
However, you can still enter costs for Equipment that do not have any Tags saved to them by leaving the “Tags” field blank.
Editing Equipment Tags on Entries
After an entry has been made, a user can see what Equipment Tag it was applied to by accessing the “Equipment Analysis” screen. This screen can be opened either by selecting “Analysis -> Daily Entries -> Equipment” menu item, clicking on the big “E” and selecting “Analysis screen”, or clicking on the cylinder icon found on the “Daily Entries -> Equipment” menu item.
 OR
OR 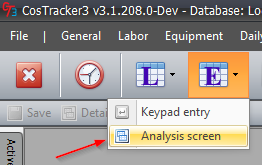 OR
OR 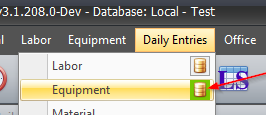
All these options will take the user to the same screen where they can review cost entries in the system and allow them to change the Equipment’s “Tag” to another existing tag for that type of equipment.
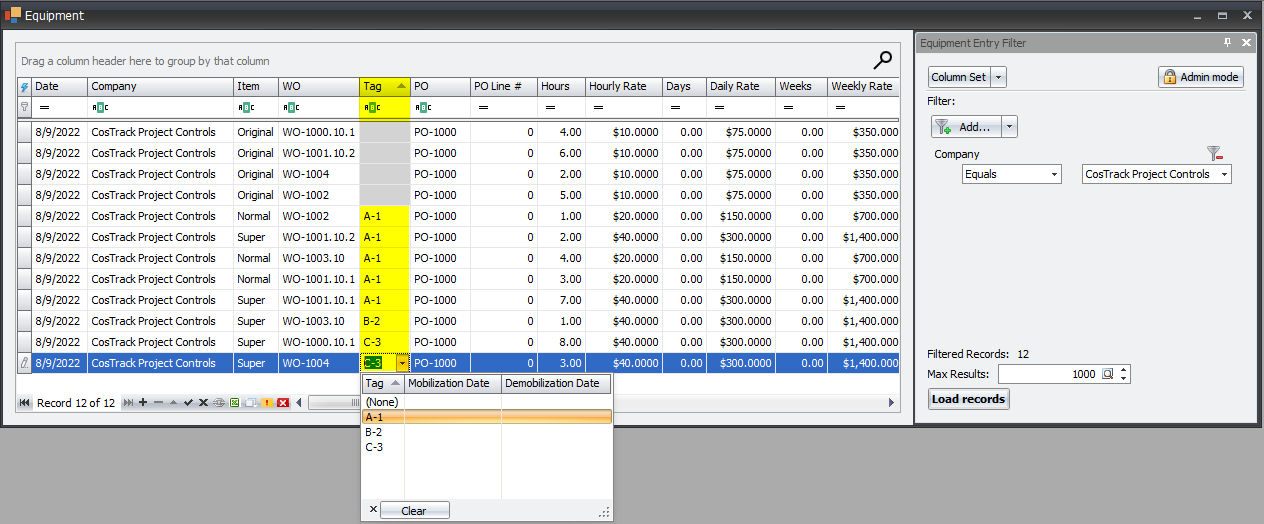
Note: the “Tag” field will be greyed out if that type of Equipment has no Tags assigned to it. Also, you will only be able to change a Tag for an entry that has not been approved yet.
Equipment Tags and Reports
An easy way to see all “Tags” that exist for Equipment items is to run the “Equipment tags by Company” report. This report can be found selecting the “Reports -> Equipment -> Equipment Lists” menu item.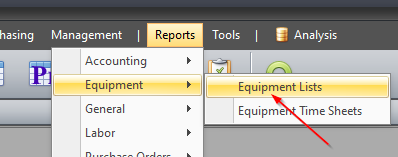
This will bring the user to the “Equipment list reports” window. From there, select the “Equipment tags by company” option from the list, add any filter criteria deemed necessary and click the “Preview” button in the lower left corner.

The generated report will show a list of each kind of Equipment, as well as list out each Tag connected to that Equipment.
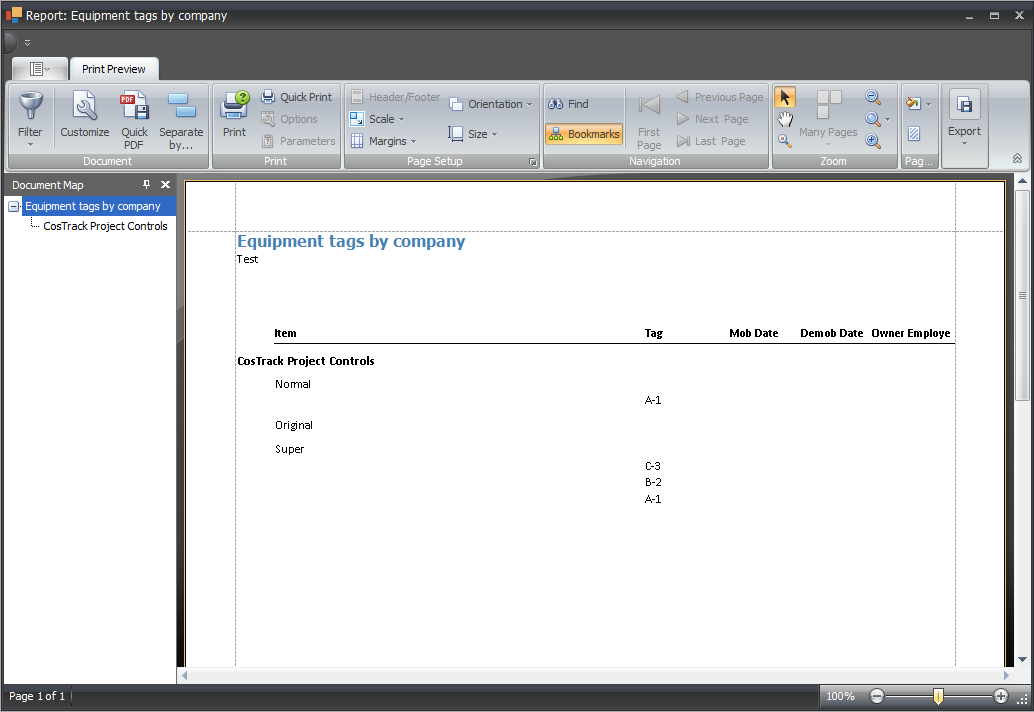
Other reports where itemized Equipment costs would be shown (such as the Detailed cost report below) will display each Equipment/Tag pair as its own line item (where applicable)
